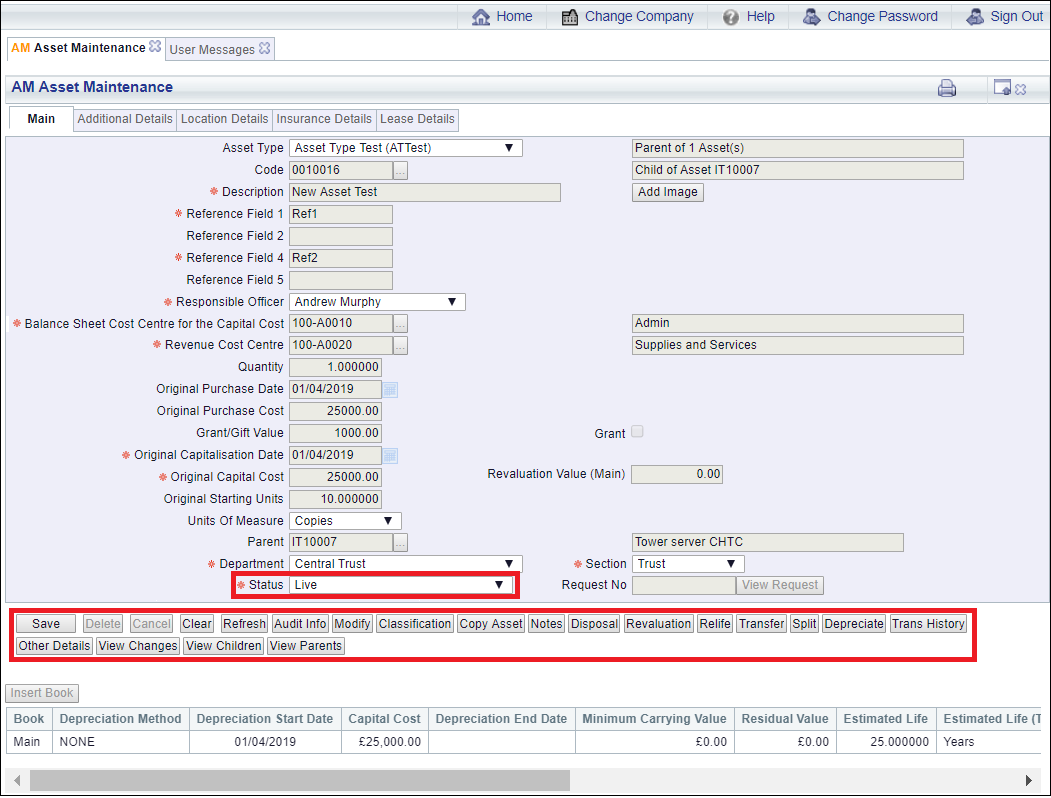
The Main tab of the AM Asset Maintenance form contains the following fields and options:

Please note: There may be fields displayed between the Description field and the Responsible Officer field:
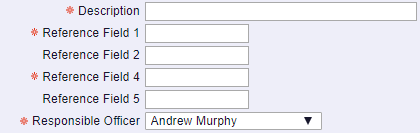
These are User defined Reference fields that are defined by the Asset Type in the Asset Type field, including the number of fields displayed (a maximum of 5), the name of the each field and whether they are mandatory or discretionary fields. The details in these fields can be amended as required. Asset Types are further detailed in the Asset Types section.
The other fields and options are further detailed below (mandatory fields are notated with a red asterisk *):
- Asset Type: This field will include the Asset Type of the Asset, which defines the User defined Reference fields displayed between the Description field and the Responsible Officer field, as detailed above.
The Asset Type will also define certain default fields when inserting an Asset Book via the  button, which is further detailed below.
The Asset Type in this field cannot be changed directly on this field but can be change via the  button, as detailed bellow. Asset Types are further detailed in the Asset Types section.
- Code: This field will include the code for the Asset and cannot be changed.
- Description: This field will include the description of the Asset and can be amended if required.
 : Clicking on this button will allow you to add an image of the Asset from your network.
An Upload Image pop-up box will open:
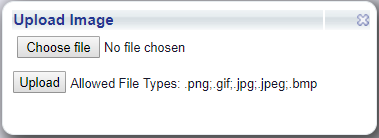
Click on the  button and select the required image from your network - the name of the mage will then be added next to this button.
Then click on the  button - the types of files that can be uploaded are listed next to this button.
- Responsible Officer: This field will contain the User name of the officer that is responsible for the Asset and can be changed by selecting a different option from the drop-down list.
- Balance Sheet Cost Centre for the Capital Cost: A General Ledger Cost Centre Code will be included in this field. This is the Cost Centre that will receive the GL postings for the Balance Sheet. It can be changed if required, by adding a different Cost Centre.
Alternatively the required Cost Centre code can be searched for and selected by clicking on the Find Cost Centre button located to the right of this field,  . This will open the AM Find Balance Sheet Cost Centres for the Capital Cost form where the required Cost Centre can be searched for and once selected will be added to this field. This form is further detailed in the Find Balance Sheet Cost Centre section.
You will note that the name of the Cost Centre appears in the adjacent field.
- Revenue Cost Centre: A General Ledger Cost Centre Code will be included in this field. This is the Cost Centre that will receive the GL postings for the Revenue Accounts. It can be changed if required, by adding a different Cost Centre.
Alternatively the required Cost Centre code can be searched for and selected by clicking on the Find Cost Centre button located to the right of this field,  . This will open the AM Find Revenue Cost Centres form where the required Cost Centre can be searched for and once selected will be added to this field. This form is further detailed in the Find Revenue Cost Centre section.
You will note that the name of the Cost Centre appears in the adjacent field.
- Quantity: This field can be used where Assets are grouped together, for example where a generic Asset is created for all Personal Computers at a specified location, a number can be added in this field for the number of Personal Computers included in the Asset. Where one is to be disposed, it can be split from the original Asset and then disposed. Splitting Assets is further detailed in the Split section and Disposals are further detailed in the Disposal section.
Where it includes 1 it will be recorded as a single Asset.
The amount in this field can be changed, if required.
- Original Purchase Date: Where a date is included in this field, it will be the date that the Asset was purchased and is for information purposes only. Where a date is included it can be changed or removed, or where the field is blank a date can be added.
- Original Purchase Cost: Where an amount is included in this field it will be the original cost of the Asset and is for information purposes only. Where an amount is included it can be changed or removed, or where the field is blank a new amount can be added.
- Grant/Gift Value: Where an amount is included in this field it will be the amount for a grant or a gift that is associated with the Asset. Where an amount is included it can be changed or removed, or where the field is blank a new amount can be added.
- Grant: Ignore this option as it is not currently being used.
- Original Capitalisation Date: A date will be included in this field that will be the original capitalisation date for the Asset. This will be used as the default date in the Depreciation Start Date field on the AM Asset Maintenance (Insert Book) form when inserting an Asset Book for the Asset via the button detailed below. The date can be changed if required.
- Original Capital Cost: An amount will be included in this field that will be the original capitalisation cost for the Asset. This will be used as the default amount on the Capital Cost field on the AM Asset Maintenance (Insert Book) form, when inserting an Asset Book for the Asset via the button detailed below. The date can be changed if required.
- Revaluation Value (Main): This field will be blank and you will not be able to change it. This field will be populated with the amount in the Original Capital Cost field, detailed immediately above, when an Asset Book is inserted on the Asset. This form is further detailed in the Insert Books section
- Original Starting Units: Where an amount is added to this field it will be used to add the starting number of units for the Asset, for example where a vehicle is purchased with mileage of 10,000. If the Depreciation Method is Units of Use, as defined in the Asset Type added to the Asset Type field, the amount in the Original Starting Units field will be used as the default amount in the Starting Units field on the AM Asset Maintenance (Insert Book) form when an Asset Book is inserted on the Asset via the button detailed below. The amount can be changed or removed or if this field is blank an amount can be added.
- Units of Measure: Where this field is populated it will be used to record the Units of Measure for the amount added in the Original Starting Units field immediately above, e.g. miles. A different option can be added, if required, by selecting a different option from the drop-down list. If this field is blank, a option can be added by selecting the relevant item from the drop-down list.
The options in this field are defined as detailed in the Units of Measure section of Asset Admin.
- Parent: Where this field includes an Asset Code, it will link the Asset to this Parent Asset to show that it belongs to a hierarchy of Assets. A different Asset Code can be added, if required. If the field is blank an Asset Code can be added.
Alternatively the required Asset code can be searched for and selected by clicking on the Find Asset button located to the right of this field,  . This will open the AM Find Asset Parents form where the required Asset can be searched for and once selected will be added to this field. This form is further detailed in the Find Asset Parent section.
Where an Asset Code is added the description of the Asset will appear in the adjacent field.
- Department: A Department for the Asset will be included in this field and can be changed, if required, by selecting a different Department from the drop-down list.
- Section: A Section for the Asset will be included in this field and can be changed, if required, by selecting a different Section from the drop-down list - the options will be dependant on the Department added to the Department field, detailed immediately above.
- Status: This will display a Status of the Asset, e,g, if a new one is being added it will have a Status of
 . You will not be able to change this field.
- Request No: This field will not be enabled but will be used where the Asset is created from an Asset Registration Request, which is further detailed in the Asset Registration Requests section.
The following buttons are also available at the bottom of the form:
 : Click on this button to save any further changes made to the fields and options on the form.
 : This button will only be enabled where the Asset has a Status of or
  . Where enabled click on this button to delete the Asset. A message will be displayed asking for confirmation that the Asset is to be deleted.
 : Clicking on this button will clear all the fields, returning you to the original version of the form where you can create a new Asset or search for an existing one.
 : Where other forms are updated that affect the details of this Asset, clicking on this form will then update those details on the AM Asset Maintenance form.
 : Clicking on this button will open the Audit Info screen, providing audit details of the Asset Type. This is further detailed in the Audit Info section.
- : This button will only be displayed where the Asset has a status of . Where displayed clicking on this button will open the AM Asset Change Type form that will allow you to change the Asset Type of the Asset. This form is further detailed in the Change Asset Type section.
 : Postings for the Asset cannot be made to the General Ledger until the Asset is Registered. Before the Asset can be Registered, an Asset Book must be inserted into the Asset - this is done via the button, as detailed below - and the Asset must also have a Classification Code, which is added via the
  button detailed immediately below.
Clicking on the button will change the Status field from to  .
.
Where the Asset has the status set to the following buttons will then be displayed:
 : Clicking on this button will cancel the Asset and change the Status of the Asset to
  . No further changed can then be made to the fields on this tab as well as the other tabs.
 : Clicking on this button will open the AM Acquisition form, allowing you to create an Acquisition Transaction for the Asset and make it a Live Asset. This form is further detailed in the Create Acquisition Transactions section.
Once an Acquisition Transaction has been created for the Asset, the Status will change to  and further buttons will be available at the bottom of the form:
These buttons are further detailed in the Amending Assets section.
Please note: ensure that all the details added to this tab, as well as the other tabs on the AM Asset Maintenance form, are correct before making the Asset a Live Asset. Once Live only certain details can be amended via the  button , which is further detailed in the Modify Live Assets section.
Once the Asset is Live, Asset Transactions can be entered for it, such as depreciation, revaluation and disposal.
- : Clicking on this button will open the AM Classification Code Maintenance form allowing you to add a Classification to the Asset. This form is further detailed the Adding Classifications section.
 : Clicking on this button will allow you to create a new Asset with the details of this Asset. The AM Asset Copy form will open with these details:
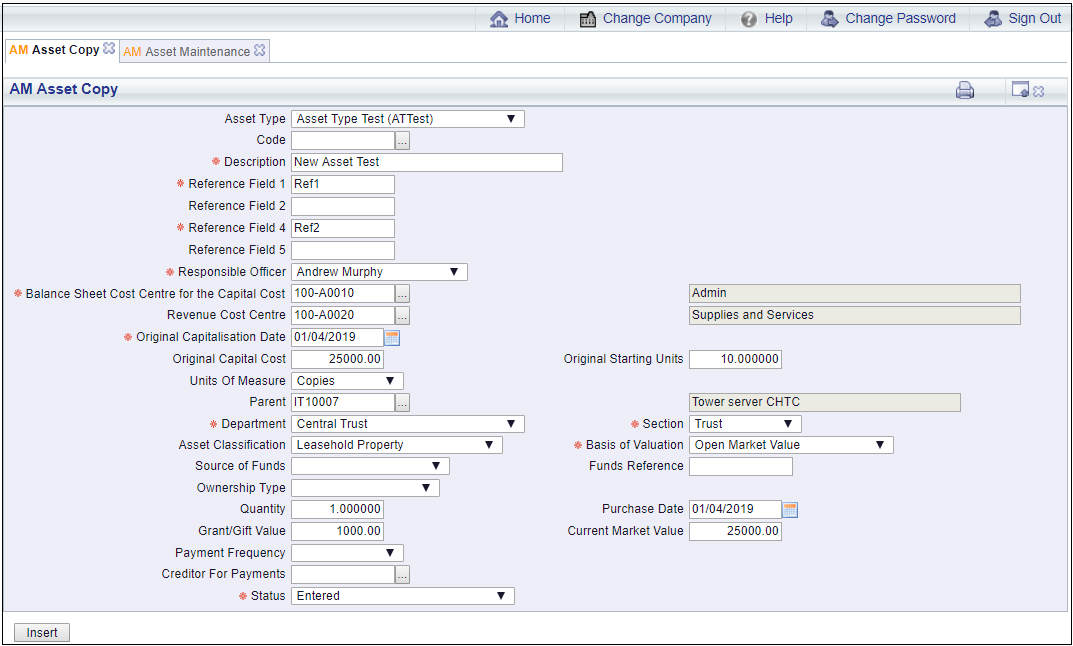
Add a code for the new Asset in the Code field, amend the details in the fields as required and click on the  button to create the new Asset.
 : Clicking on this button will allow you to add a note with regard to the Asset. This is further detailed in the Notes section.
 : Clicking on this button will open the AM Asset Other Details screen and will display the full financial information from the Asset Book added to the Asset. This form is further detailed in the Other Details section
Please note: An Asset Book will need to be inserted into the Asset via the button, as detailed below, before these details can be displayed on this form.
Please note: The only changes that can be viewed are those that have been done via the button when the Asset has a status at , which is further detailed in the Modify Live Assets section.
 : This button will only be displayed where the Asset is a Child of another Asset. Clicking on this button will open the AM Asset's Parents form, allowing you to view the Asset's Parents. This form is further detailed in the Assets Parents section.
 : This button will only be displayed where the Asset is a Parent of at least one other Asset. Clicking on this button will open the AM Asset's Children form, allowing you to view the Asset's Children. This form is further detailed in the Assets Children section.
- : Click on this button to insert an Asset Book. The AM Asset Maintenance (Insert Book) form will open allowing an Asset Book to be added. This form is further detailed in the Insert Book section.
Please note: A Main Asset Book will be required to be added. Further Asset Books can be added but only if this had been configured with agreement from your organisation.
Once an Asset Book has been inserted, it will be added to a Grid underneath the button:
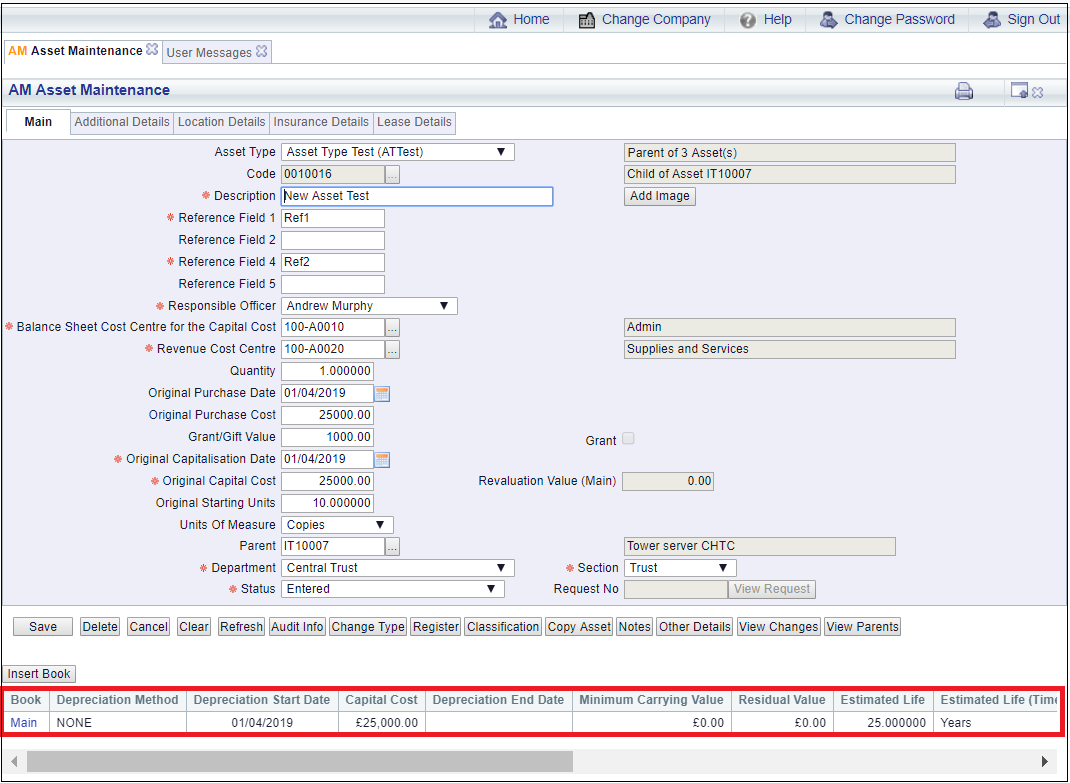
Further Asset Books can be inserted but only if FinancialsLIVE has been configured to allow more than one Asset Book to be inserted into an Asset.