The AM Asset Registration Request form can be accessed from various forms and screens on the Asset Management module and will open when the Asset Registration Request has a status of  :
:
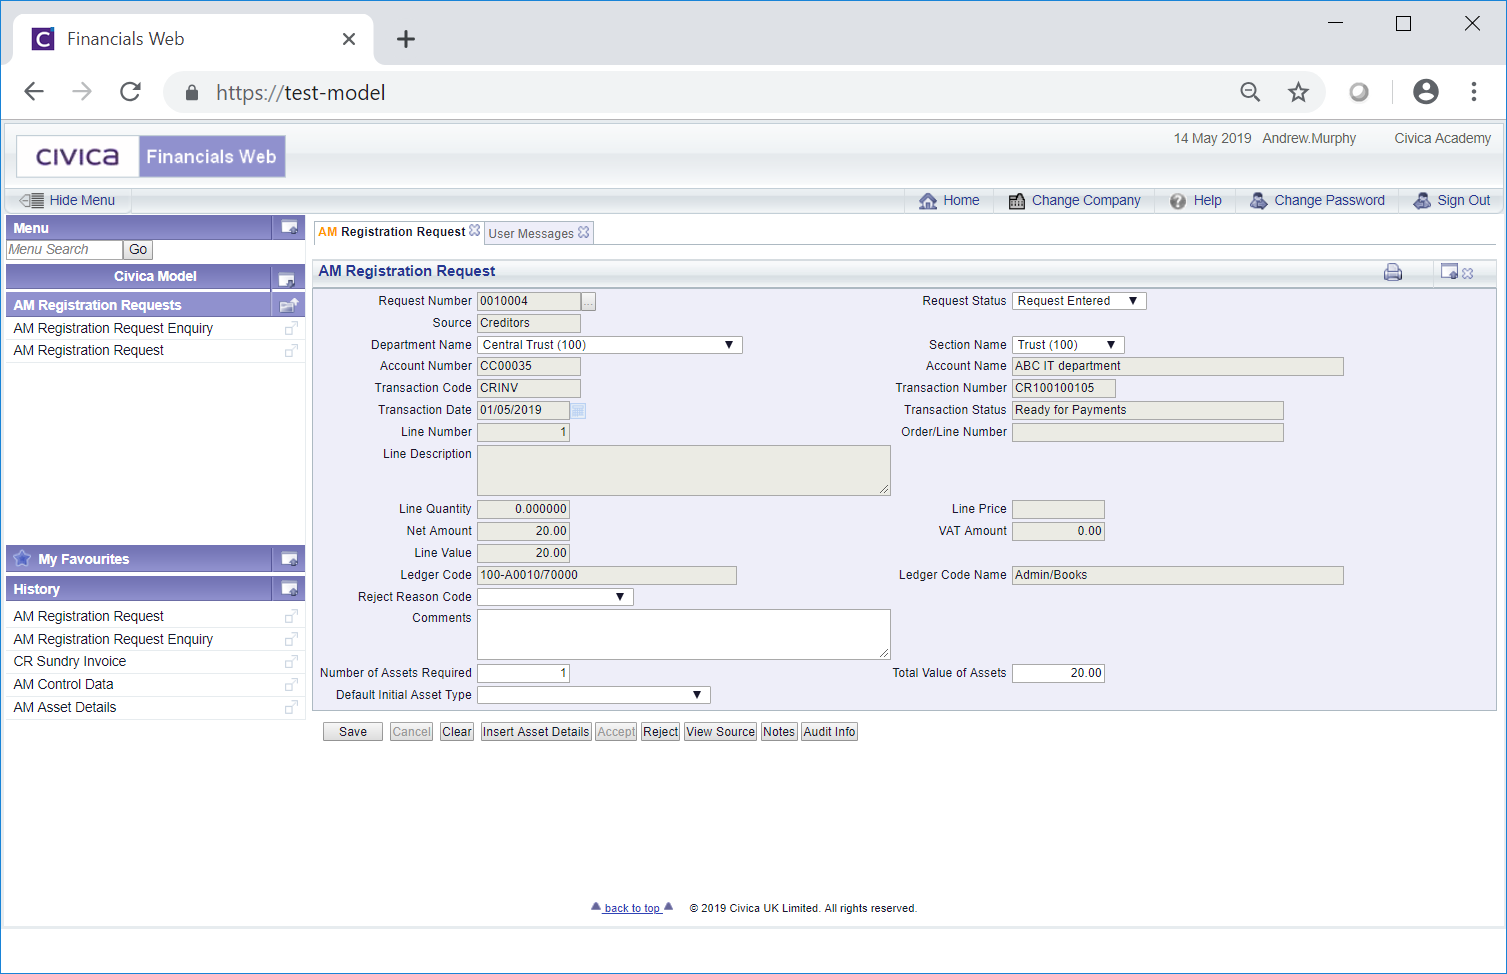
This form will allow you to amend, reject or accept the Asset Registration Request. Once the request has been accepted the Asset will be created from the Request.
The majority of details in the fields on the form come from the Creditor Invoice Line where the Asset option was selected.
Only the following fields can be changed:
A different option can be selected or where the field is blank an option can be selected from the drop-down list.
The buttons at the bottom of the form are as follows:
 : Clicking on this button will open the CR Invoice Enq screen displaying details of the Creditor Invoice from which the Asset Registration Request was created. This screen is further detailed in the Invoice Enq section.
 . This is further detailed in the Notes section.
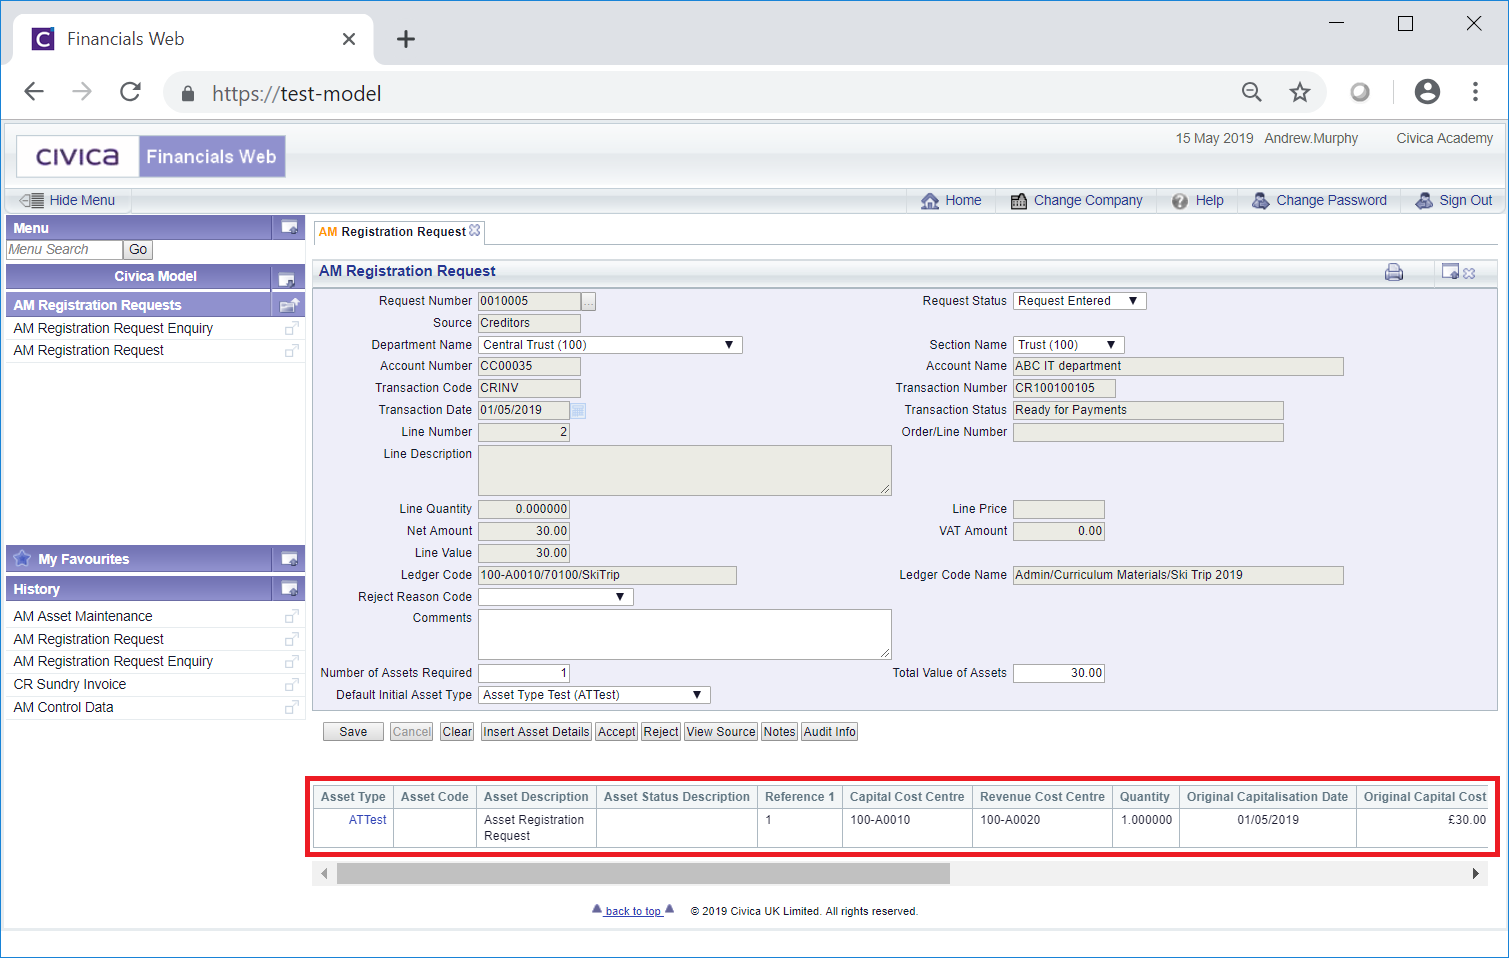
 : Clicking on this button will open the AM Request Asset form allowing you add details of the new Asset to the Asset Registration Request. This form is further detailed in the Adding Asset Details section.
Once the Asset details have been created they will appear in a Grid at the bottom of the AM Registration Request form:
Where Asset details are added to the bottom of the form clicking on the button will open the AM Request Asset form, as detailed in the Adding Asset Details section, allowing you to add details for another Asset to the Registration Request. Once created it will be added to a new Line in the the Grid at the bottom of the AM Registration Request form.
Clicking on the link in the Asset Type column on the Grid:
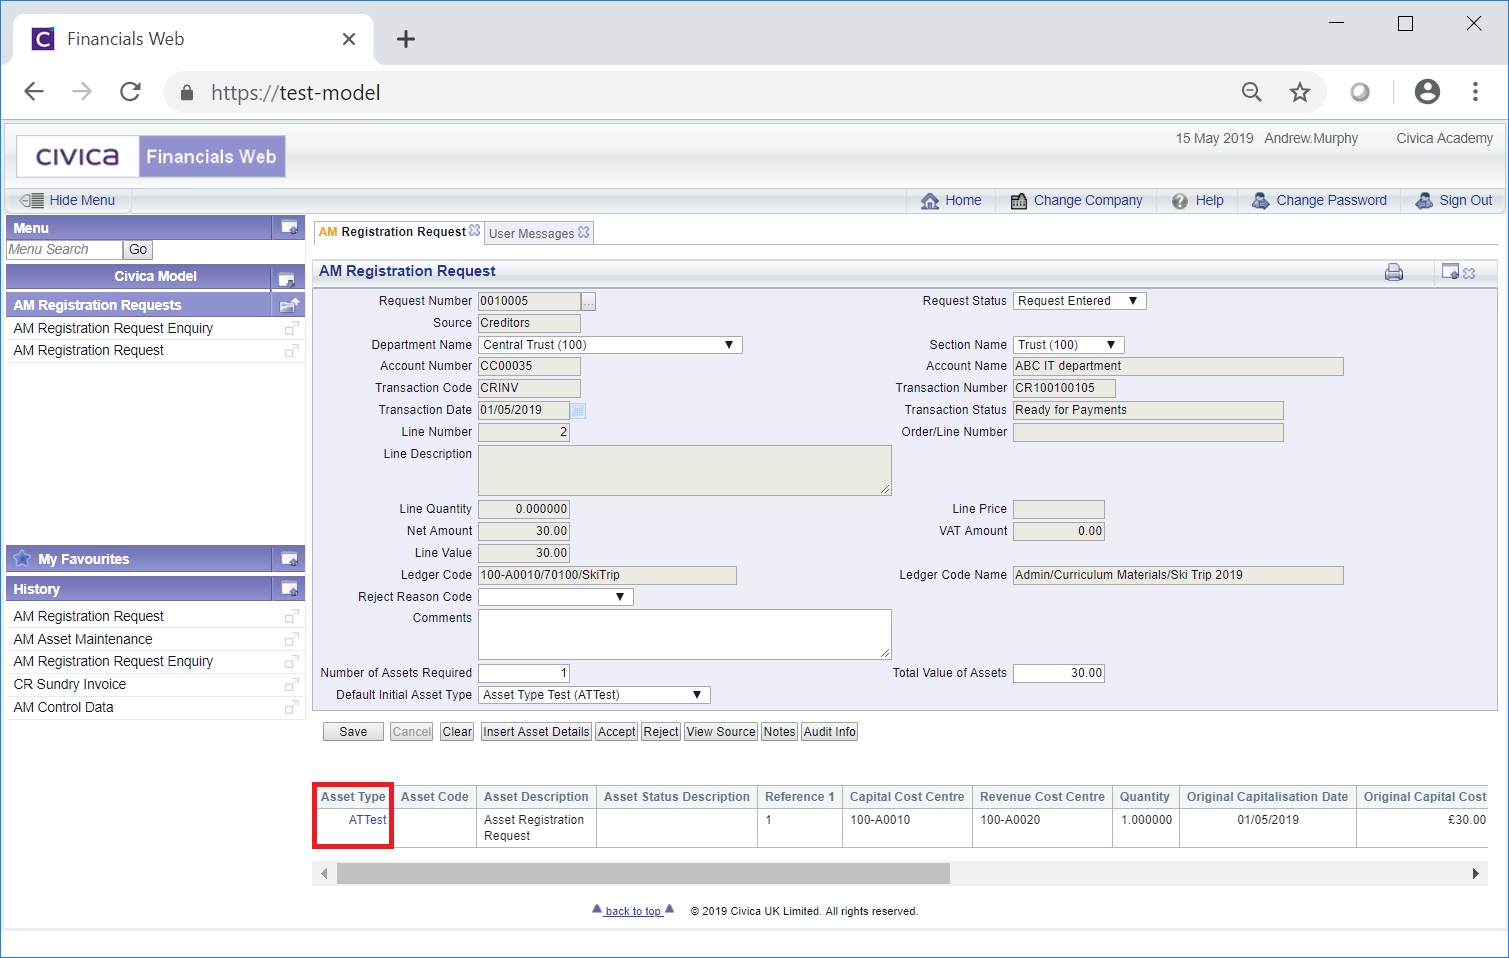
Will open the AM Request Asset form, as detailed in the Amending Asset Details section, allowing you to amend the details of the Asset.
as detailed above.Clicking on the ![]() button will open the AM Request Accept form allowing you to accept the Asset Registration Request, creating the Asset in the Asset Management module. This form is further detailed in the Accepting Asset Registration Requests section.
button will open the AM Request Accept form allowing you to accept the Asset Registration Request, creating the Asset in the Asset Management module. This form is further detailed in the Accepting Asset Registration Requests section.