The AM Relife form will allow you to create transactions that change the Estimated Life and/or the Residual Value of an Asset Book in an Asset without affecting the current value of the Asset on the Balance Sheet.
This form can be accessed by selecting the Financials option on the Financials Web Main Menu:
Then the Asset Management menu option:
Then the AM Asset Transactions menu option:

Then the AM Relife menu option:

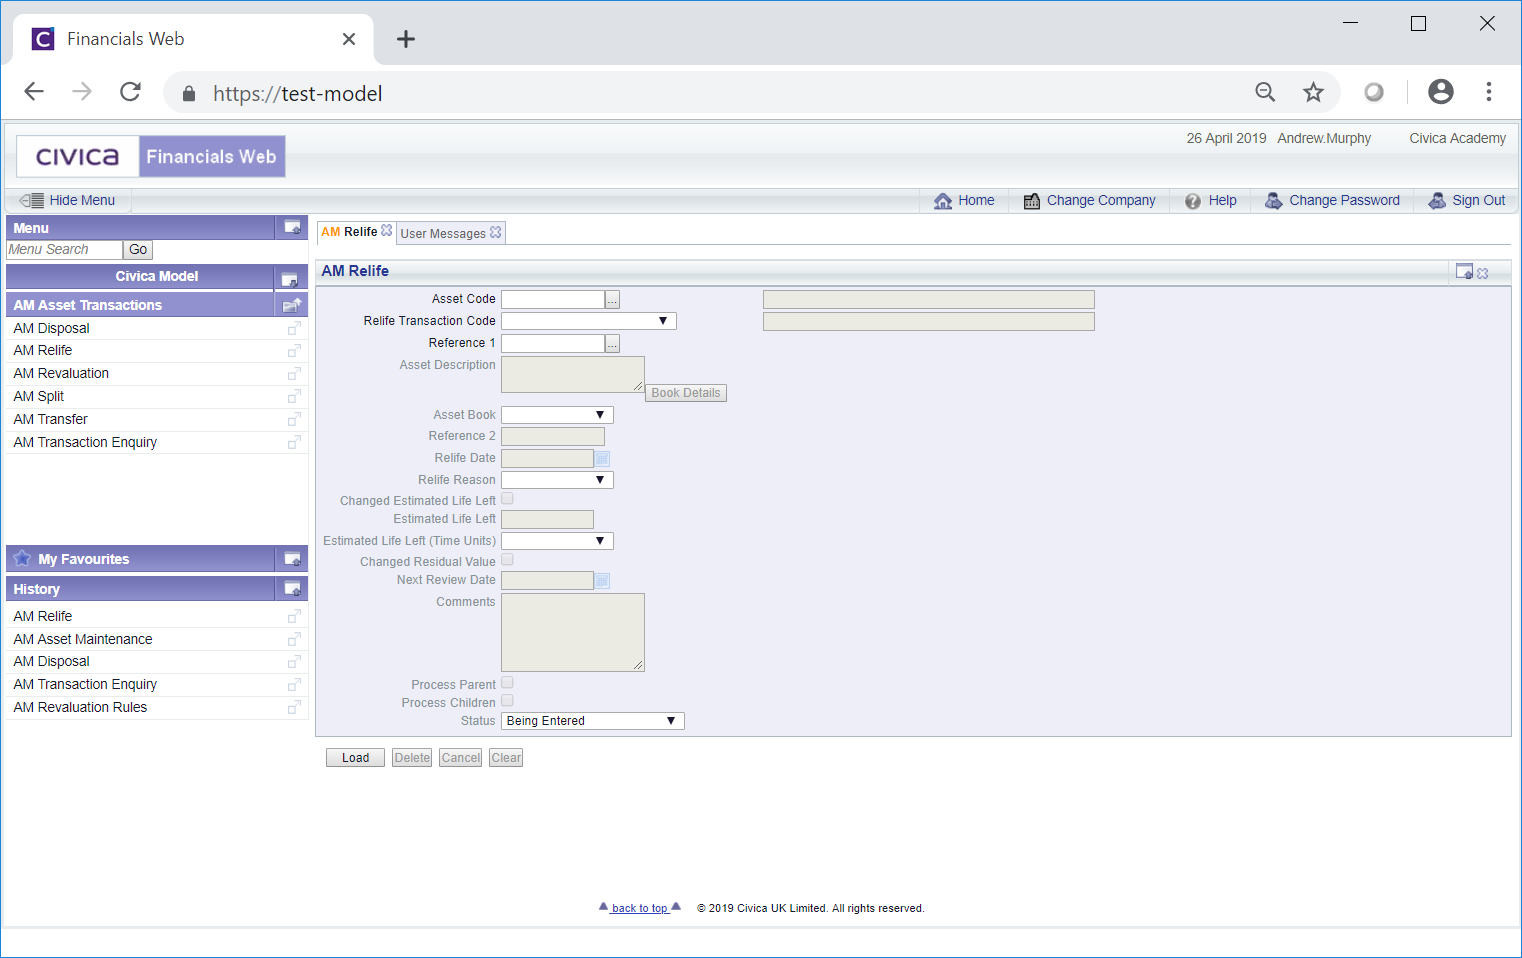
The AM Relife form will open:
This form can also be accessed by clicking on the  button on the Main tab of the AM Asset Maintenance form, as detailed in the Amending Assets section. In this case certain fields will be populated from the Asset on the AM Asset Maintenance form:
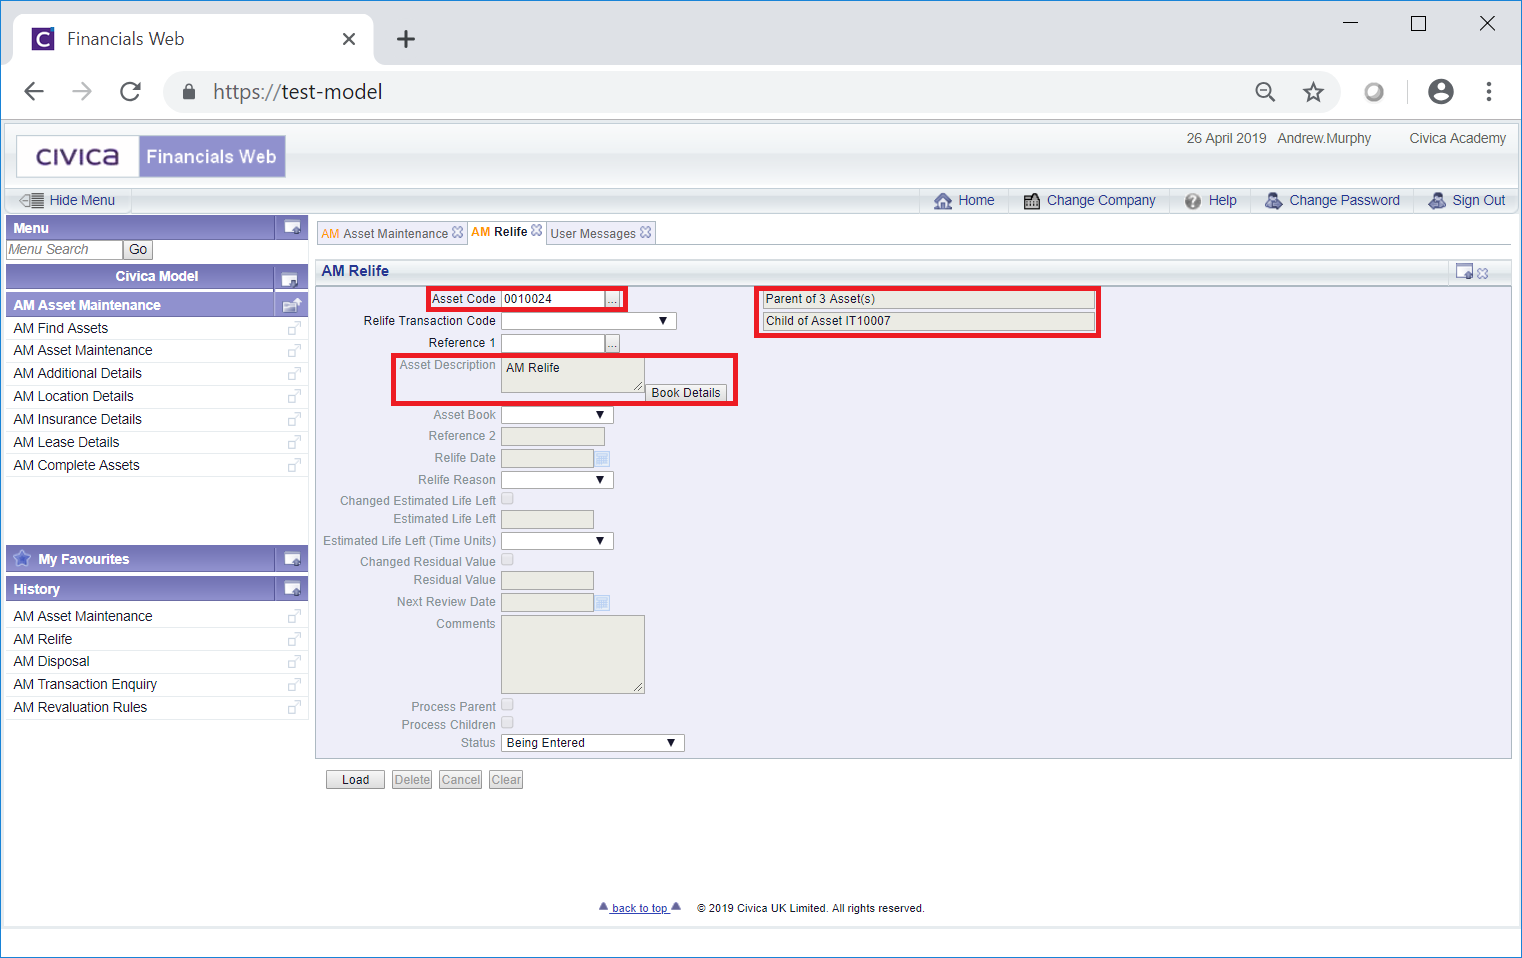
A  button will also be available - clicking on this button will open the AM Asset Book Values Before the Transaction screen, detailing values of the Main Asset Book before the Relife transaction. This screen is further detailed in the Asset Book Values section.
To create a Relife transaction add the code of the required Asset to the Asset Code field, if not already populated. Alternatively click on the Find Asset button located to the right of this field,  . This will open the AM Find Asset form allowing you to search for and select the required Asset. This form is further detailed in the Find Asset section.
Select a code in the Relife Transaction Code drop-down field.
A unique transaction reference will need to be added to the Reference 1 field where these are not automatically generated. Where these are generated automatically this field can be left blank. Please note: this field may have a different label dependent on your configuration.
Click on the  button:
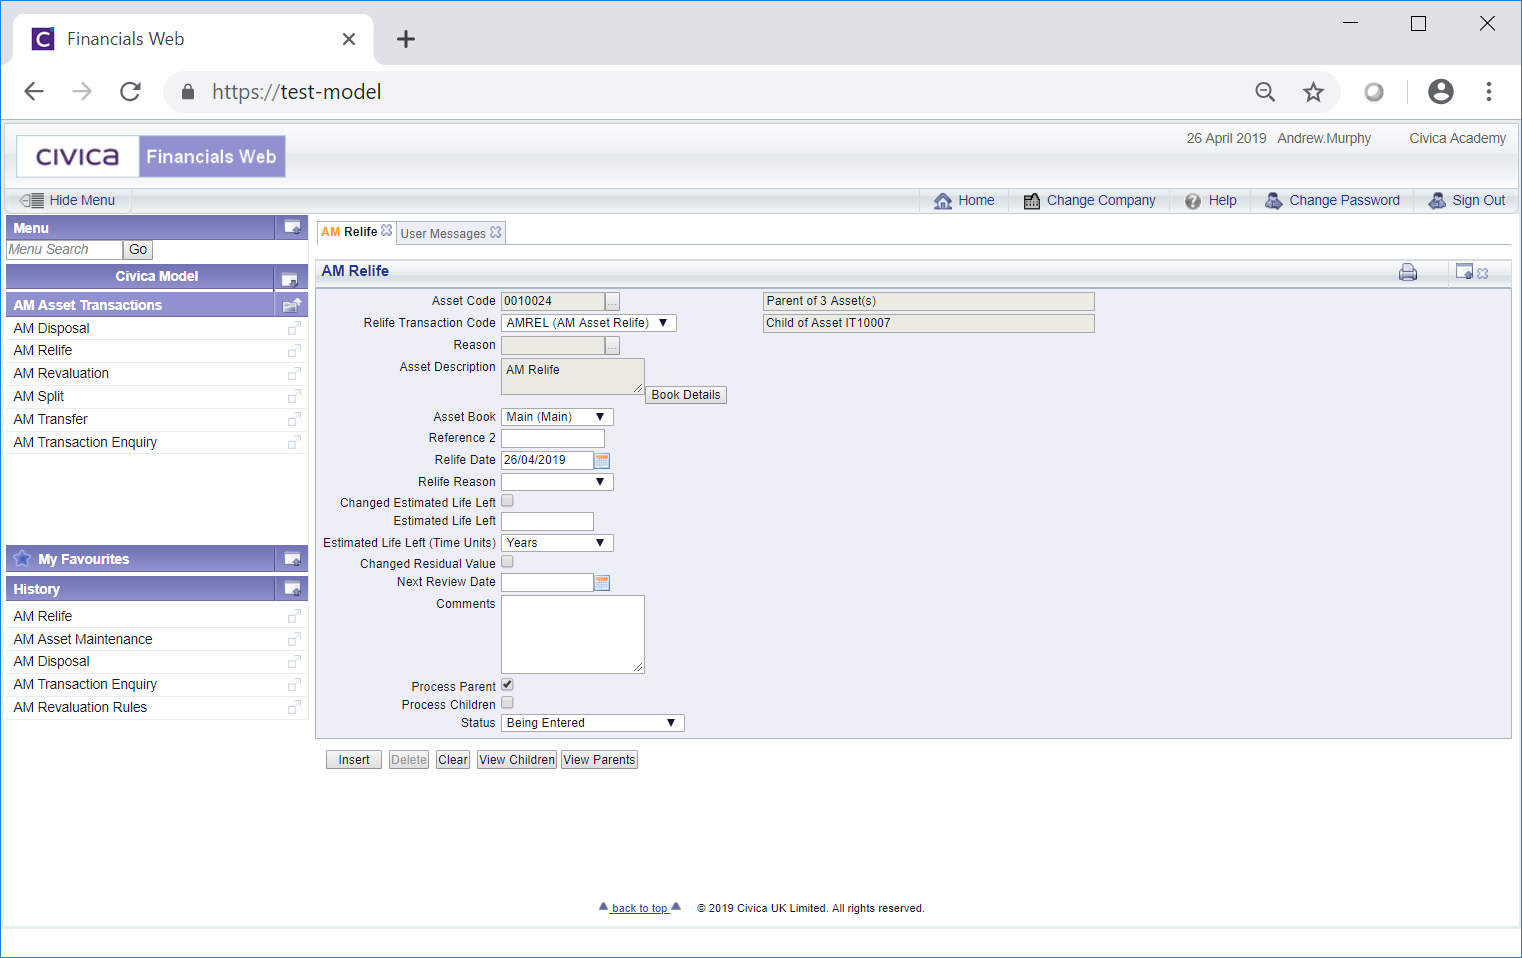
The following fields may be displayed:
- Asset Code: This field will display the code of the Asset and cannot be changed.
- RelifeTransaction Code: This field will display the transaction code for the Relife transaction and cannot be changed.
- Reference 1: This field will contain the reference for the transaction where it has been manually added. Where it is to be automatically generated this field will be blank. The details in this field cannot be changed. Please note: this field may have a different label dependent on your configuration.
- Asset Description: This field will contain the description of the Asset and cannot be changed.
At the bottom right of this field is a button. Clicking on this button will open the AM Asset Book Values Before the Transaction screen, detailing values of the Main Asset Book in the Asset before the Relife transaction. This screen is further detailed in the Asset Book Values section.
- Asset Book: This will display the Asset Book for the Asset and will default to the Main Asset Book option. This can be changed where the Asset has other Asset Books.
- Reference 2: This is a second reference field that can be added if required. Dependant on your configuration this field may not be displayed and if displayed may have a different label and will either be a mandatory or an optional field.
- Relife Date: This field will display the date of the Relief transaction and will default to the current Assets Processing Date (normally today's date)but can be changed if required.
- Relife Reason: Select on option from this drop-down field to provide a reason for the transaction if required. Reasons are defined as detailed in the Reasons section within Asset Admin.
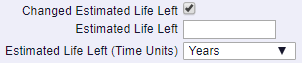
- Changed Estimated Life Left: This option will only be displayed where the Depreciation Method specified on the Asset Book is not Units of Use. Where displayed it will only be enabled if it has been configured to be available. Selecting this option will result in the following fields being displayed:
These are:
- Estimated Life Left: Add an amount for the time period that will be selected in the Estimated Life Left (Time Units) field immediately below this field, e.g. 2. This will change the amount in the Estimated Life Left field on the Asset Book.
Please note: The amount in the Estimated Life field on the Asset will also be recalculated from the date in Depreciation Start Date field on the Asset.
- Estimated Life Left (Time Units): Select the relevant time period from this drop down field, e.g. months or years. This field will default to the current option in the Asset Book and changing it will also change the option in the Asset Book.
- Changed Estimated Life Left (Units): This option will only be displayed where the Depreciation Method specified on the Asset Book is Units of Use. Where displayed it will only be enabled if it has been configured to be available. Selecting this option will result in the following fields being displayed:

These are:
- Estimated Life Left (Units): Add an amount for the Units of Measure displayed in the Estimated Life Left (UOM) field immediately below this field, e.g. 100. This will change the amount in the Estimated Life Left Units field on the Asset Book.
- Estimated Life Left (UOM): The details on this field shows the Units of Measure for the number of Units in the Estimated Life Left (Units) field immediately above, e.g. miles. This is for information purposes only and cannot be changed.
- Change Residual Value: This option will only be enabled if it is configured to be available. Where enabled selecting this option will result in the following field being displayed:

This field is:
- Residual Value: Add the new amount for the residual value of the Asset to this field. This will change the Residual Amount on the Asset.
- Next Review Date: This field is an optional field on the Asset and can be used via the Reporting functionality to review Assets in a timely manner. Dependant on your configuration this field may not be displayed on the AM Relife form and if displayed will either be a mandatory or an optional field. Where displayed add a date to this field to change the date in the Next Review Date field on the Asset.
- Comments: Dependant on your configuration this field may not be displayed. Where it is displayed it will either be a mandatory field, in which case further details on the transaction must be added, or an optional field, in which case further details may be added or it can be left blank.
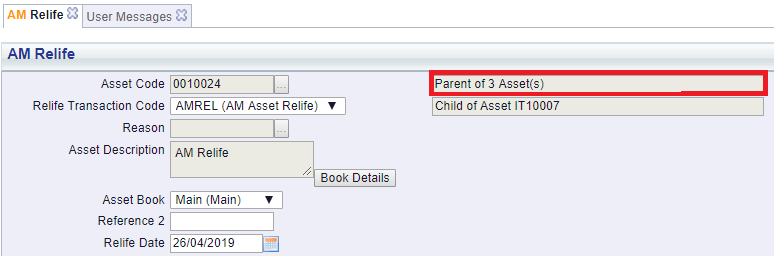
- Process Parents: This option will be available where the Asset has one or more Child Assets, i.e. it is a Parent Asset, and it will be selected by default. Whether the Asset is a Parent Asset will also be detailed at the top of the from:
Please note: the number of Children in this field will not include any Child Assets that have been Disposed or have been Cancelled. In addition Assets with a Depreciation Method specified on the Asset Book of Units of Use will not be able to include any Child Assets as part of the processing for Relife transactions.
Where this option is selected this Asset, i.e. the Parent Asset, will be processed. This option can be deselected where only the Child Assets are to be processed, i.e. those that have not been Disposed or Cancelled. Some of the fields detailed above will be used when processing these Child Assets such as the Relife Reason and Comments.
- Process Children: This option will be available where the Asset has one or more Child Assets, i.e. it is a Parent Asset, but the option will not be selected. Whether the Asset is a Parent Asset will be detailed at the top of the from:
Please note: the number of Children in this field will not include any Child Assets that have been Disposed or have been Cancelled. In addition Assets with a Depreciation Method specified on the Asset Book of Units of Use will not be able to include any Child Assets as part of the processing for Relife transactions. The Depreciation Method can be found on the Grid at the bottom of the AM Asset Maintenance form of the Asset.
Where both the Parent and it's Children are selected to be processed there will be the option to process any Child Asset that has a Status of  at the same time as the Parent is processed.
- Status: This will be set to
 and you will not be able to change this field.
The buttons at the bottom of the form are as follows:
 : Clicking on this button will clear all the fields on the form and no Relife transaction will be created. The initial version of the form will be displayed where you can create a new Relife transaction or view an existing one.
 : This button will only be enabled where the Asset is a Parent Asset, i.e. it has one or more Child Assets. Clicking on this button will open the AM Asset's Children form, displaying the Asset's Children. This form is further detailed in the Assets Children section.
 : This button will only be enabled where the Asset is a Child Asset, i.e. it has a Parent.
Another field near the top of the form will also provide details where the Asset is a Child of another Asset:

Clicking on the button will open the AM Asset's Parents form, displaying the Asset's Parents. This form is further detailed in the Assets Parents section.
 : Click on this button to create the Relife transaction:

Where the Process Child option has been selected on the form, the relevant Child Assets will be included in a Grid at the bottom of the form, i.e. those that have not been Disposed or have not been Cancelled.
The same fields as detailed above will still be available and some can be changed, if required.
You will note that the Status of the transaction has now changed to  and that further buttons are now be available at the bottom of the form.
These are:
 : Click on this button to save any further changes to the fields on the form as well as to any changes to any Grid displayed at the bottom of the form.
 : Click on this button to delete the transaction. A message will be displayed asking for confirmation that the transaction is to be deleted. Please note the transaction can only be deleted where the status is set to .
- : Clicking on this button will now clear all the fields on the form as well as any Grid displayed at the bottom of the form. The initial version of the form will be displayed where you can create a new Relife transaction or view an existing one.
 : Clicking on this button will allow you to add a note with regard to the Relife transaction. This is further detailed in the Notes section.
 : Clicking on this button will open the Audit Info screen, providing audit details of the Relife transaction. This is further detailed in the Audit Info section.
 : Clicking on this button will complete the Relife transaction
Where the Process Child option has been selected on the form ensure that the Process Child column in the Grid at the bottom of the form is also selected.
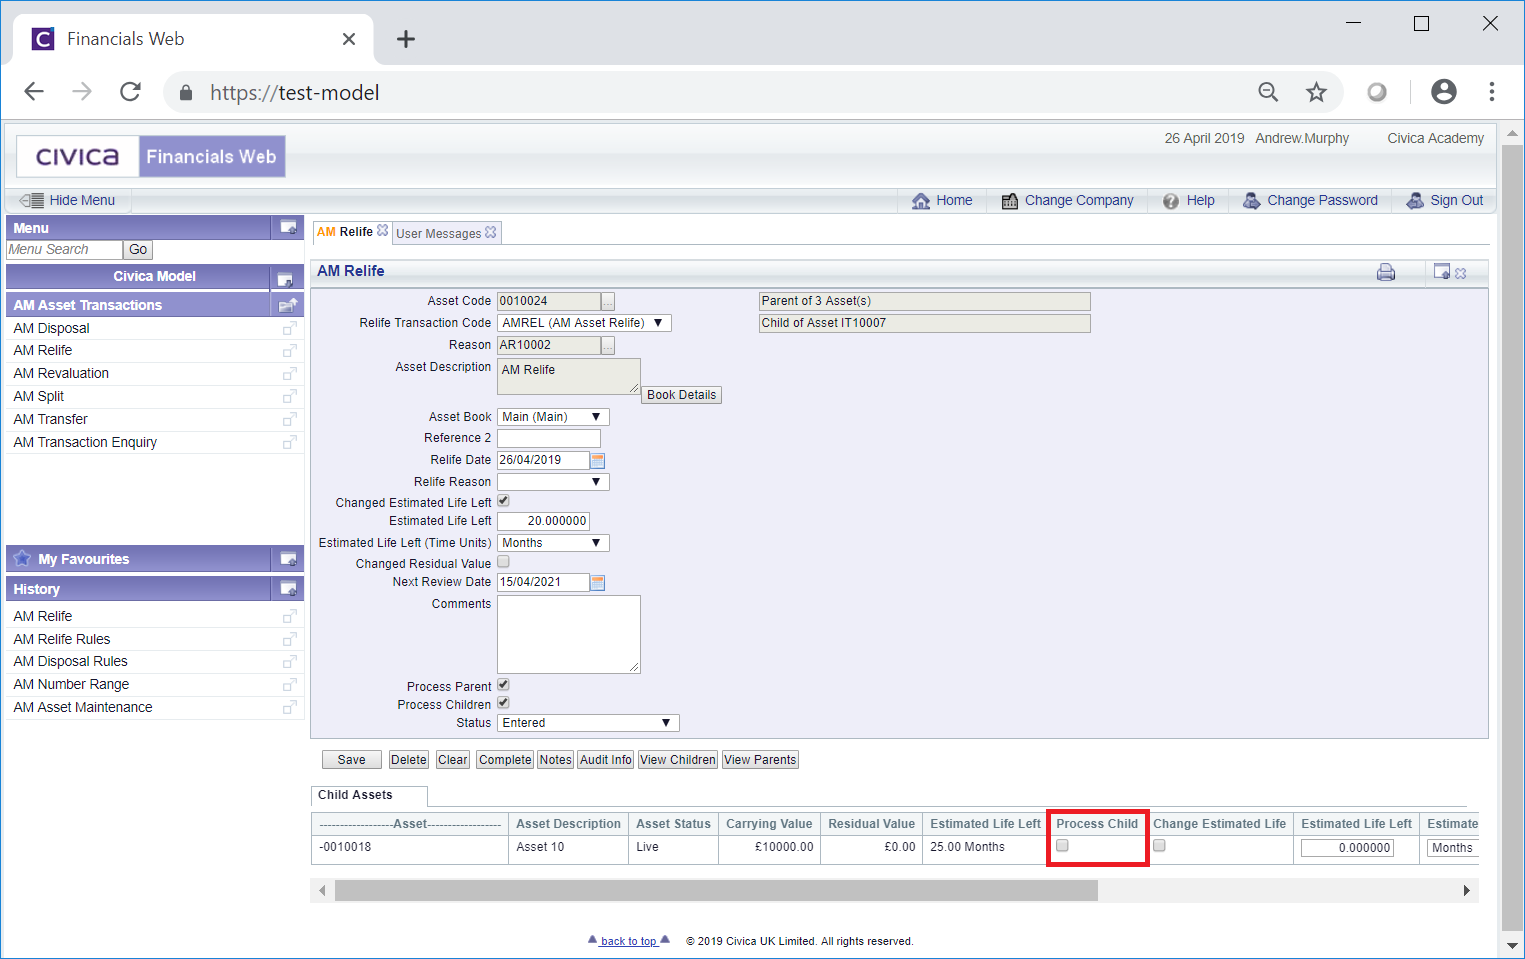
Where more than one Line is included in the Grid select this column for each Child that is to be processed.
Also ensure that the following columns are also completed as required for each Child that is to be processed:
- Change Estimated Life: Select this option to include the new Estimated Life for the Child.
- Estimated Life Left: Where the Change Estimated Life option is selected, as detailed immediately above, add the amount of the new estimated life for the time period in the Estimated Life Left (Time Units) column as detailed immediately below.
- Estimated Life Left (Time Units): Where the Change Estimated Life option is selected, as detailed above, select the relevant time period from this drop down field, e.g. months or years, for the amount added in the Estimated Life Left column detailed immediately above. This column will default to the current option in the Child's Asset Book and changing it will also change the option in this Asset Book.
- Changed Residual Value: Select this option where the residual value of the Child Asset is to be changed.
- Residual Value: Where the Changed Residual Value option is selected, as detailed immediately above, add the new residual value for the Child Asset to this column.
Once the button has been selected the form will change to a read only version of the AM Relife form where no further changes can be made and the Status of the Relife transaction will change to  . This form is further detailed in the AM Relife (Readonly) form section.