Product Classes are maintained on the Edit Product Class form, which can be accessed in various ways as detailed in the Product Class Maintenance section:
The Edit Product Class form will be displayed:
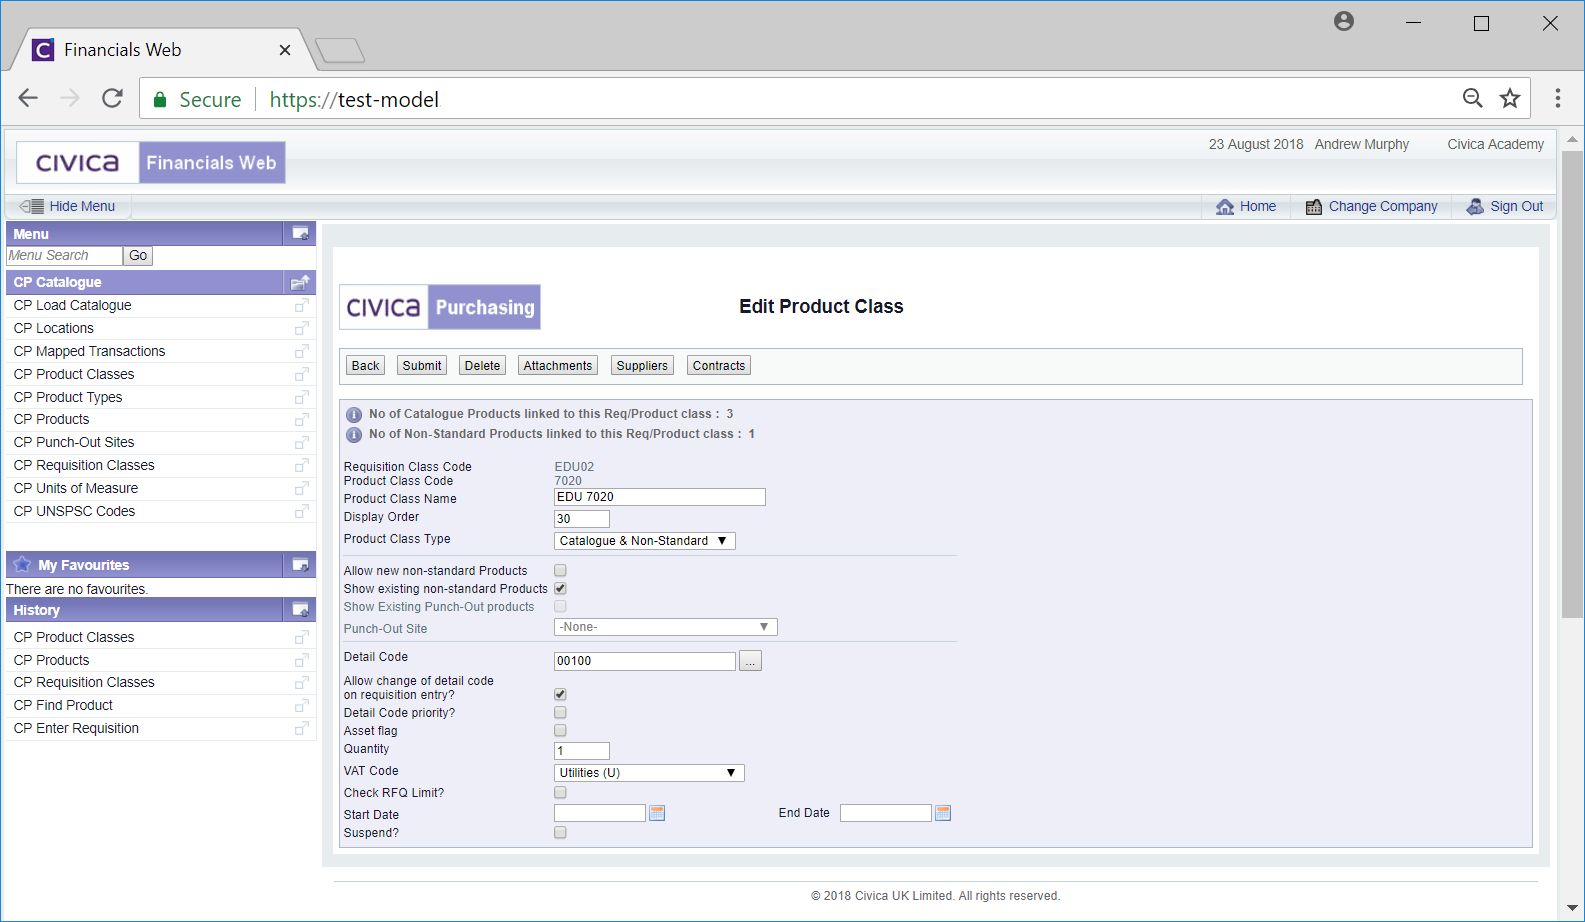
The number of linked Catalogue or Non-Standard Products will be displayed at the top of the form:

The fields on this form are:
- Requisition Class Code: This is the code of the Requisition Class that the Product Class is linked to and this code cannot be changed.
- Product Class Code: This is the Code for the Product Class, which cannot be changed.
- Product Class Name: This is the name of the Product Class, which can be changed if required.
- Display Order: This field is used to display the order of Product Classes within the Add Requisition screen, i.e when creating a Requisition a list of Product Classes will be displayed:
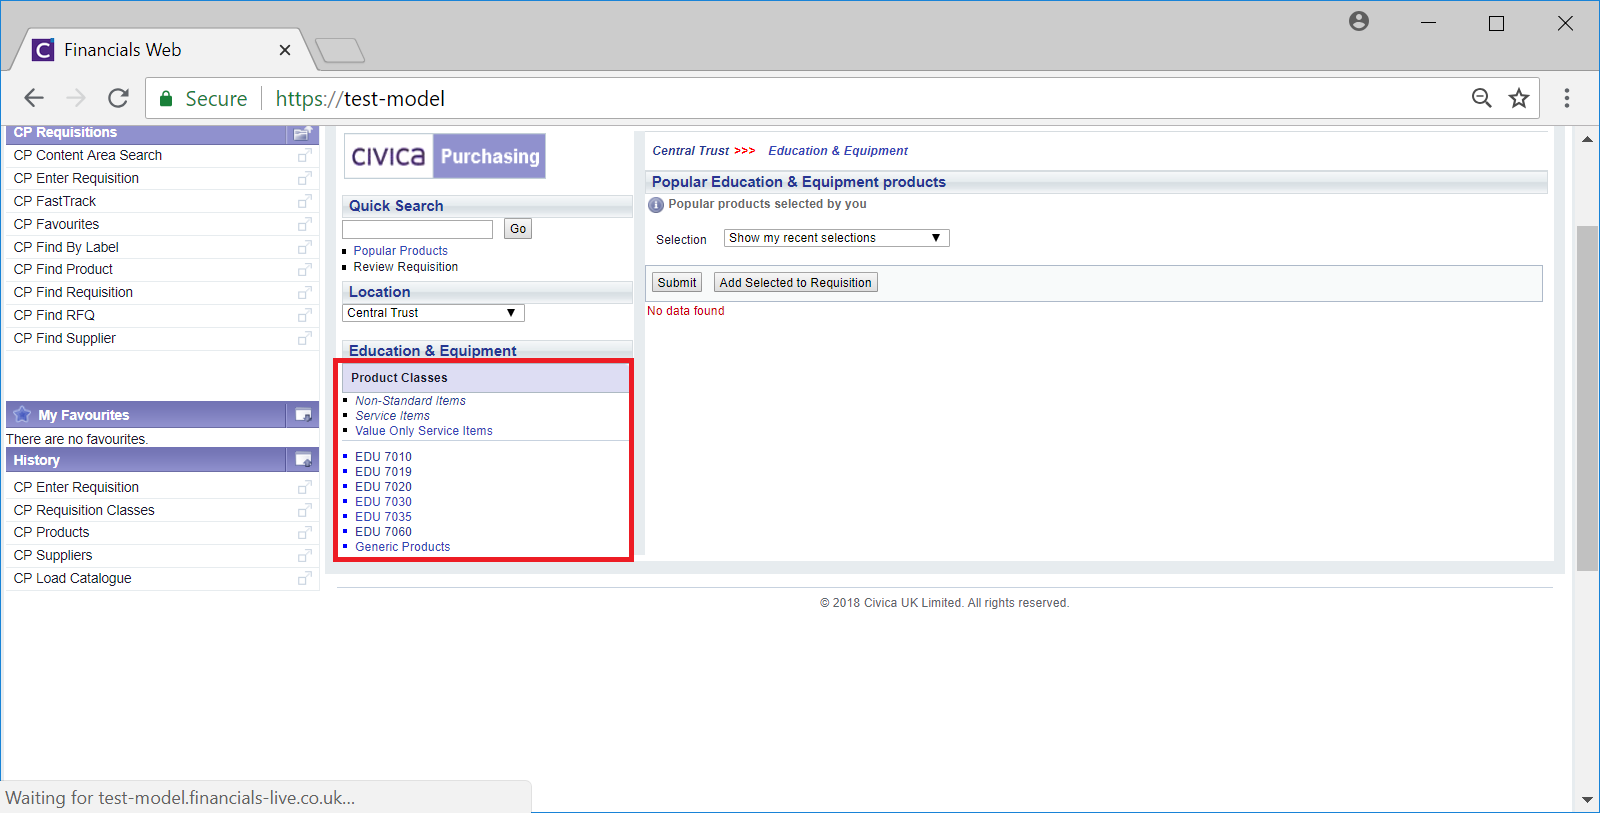
The items displayed in the bottom of this section are the Product Classes.
The display order is defined by the ranking number (a number between 1 and 9999 inclusive) added to the Display Order field. The lower the ranking number, the higher it will appear in the list of Product Classes displayed on the list, e.g. 1 will put it to the top of the list.
This field can be changed if required - it is recommended to have gaps between the numbers used if there are a lot of Requisition Classes, e.g. 10, 20, 30 etc.
- Product Class Type: This will display the current type of Product Class and can be changed if required.
- Allow new non-standard Products: This option will only be available if the option in the Product Class Type field, immediately above, is either Catalogue and Non-Standard or Non-Standard Only and the user has the correct access rights.
Where this option is selected Non-Standard Products that are linked to the Product Class can be added to a Requisition:
A  button will be available on the Add Requisition screen:
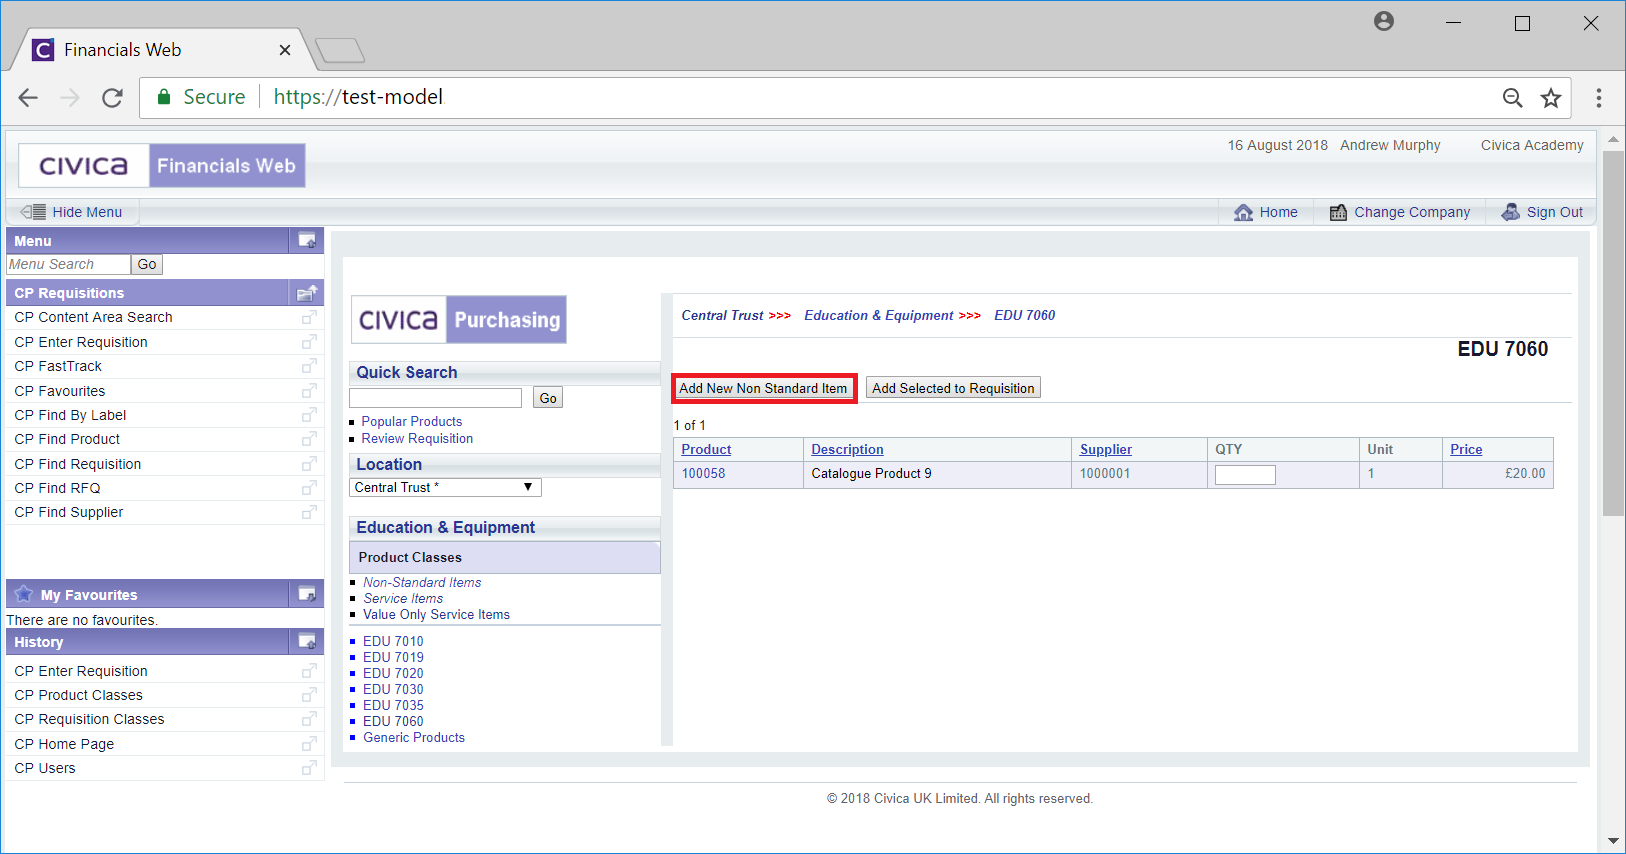
Adding Non-Standard Items to a Requisition is further detailed in the Non-Standard Products section.
- Show existing non-standard Products: This option will only be available if the option in the Product Class Type field above is either Catalogue and Non-Standard or Non-Standard Only and the user has the correct access rights.
Where this option is selected the Non-Standard Products linked to the Product Class can be viewed and will be available for selection when creating a Requisition:

You will note that the Product Code in the Product column on the Grid is in italic font - this indicates that this is a Non-Standard Product.
Adding Non-Standard Items to a Requisition is further detailed in the Non-Standard Products section.
Please note: If the Catalogue and Non-Standard or the Non-Standard Only option is selected in the Product Class Type field, at least one of the above options must be selected, i.e. either the Allow new non-standard Products option, the Show existing non-standard products option, or both.
- Show Existing Punch Out Products: Please ignore this option as the functionality is not currently being used.
- Detail Code: A Detail Code added to this field can be changed if required. Click into the field to make the changes or alternatively search for the required Detail Code by clicking on the Find Detail Code button to the right of this field:
 . This will open the Find Detail Code form, where you can search for and select the relevant Detail Code. This is further detailed in the Find Detail Code section.
This Detail Code will only be used if the linked Product does not have Detail Code, unless the Detail Code priority? option has been selected, as detailed below.
- Allow change of detail code on requisition entry?: If this option is selected the Detail Code can be changed when adding a linked Product to a Requisition. If it is not selected the user will only be able to change the Detail Code if it is not a valid Detail Code on the Requisition.
In addition, if this option is not selected, the Approver will not be able to change the Detail Code unless they have the Change the Locked Detail Code option selected on their User record.
This option can be selected or deselected as required.
- Detail Code priority?: This option will be selected if the Detail Code is to be taken from this Product Class rather than the linked Product - when a linked Product is added to Requisition the Detail Code used will be the one added to this Product Class and not the linked Product.
- Asset Flag: This option will be selected in order to display an Asset option where Products associated with this Class are added to a Requisition. Users can select this option to create an Asset Registration Request once a Purchase Order that contains the Requisition is approved. This will allow the purchased product to be created as an Asset within the FinancialsLIVE Asset Management module. Asset Registration Requests are further detailed in the Asset Registration Requests section.
This option can be selected or deselected as required.
- Quantity: A default amount can be associated with the Product Class. This amount will be displayed in the Quantity field when a linked Product is selected to be included in a Requisition. This field is normally left blank in which case the User will need to add a quantity amount.
- VAT Code: A VAT code may added to this field or one can be added or it can be changed by selecting an option from this drop-down field. This will be used when a linked Product that does not have a VAT Code is added to a Requisition.
- Check RFQ Limit: Please ignore this option as the functionality is not being used.
- Start Date & End Date: Start and End dates may be added and these field can be changed as required or new dates added. The Start Date is the date from which the Product Class will be available. The End Date will be the date that it is no longer available. In effect this will limit when this Product Class will be available. These fields can be left blank if the Product Class is to be used continually.
- Suspend: This option should only be selected if the Product Class is no longer to be used. This option can be selected or deselected as required.
The following buttons are also available:
 : Clicking on this button will return you to the previous screen, i.e. the Product Classes screen, where you can select another Product Class to edit, if required. Any unsaved changes will be lost.
 . Click on this button to save any changes made to the Product Class
 : Clicking on this button allow you to delete the Product Class. The Delete Product Class screen will be displayed:
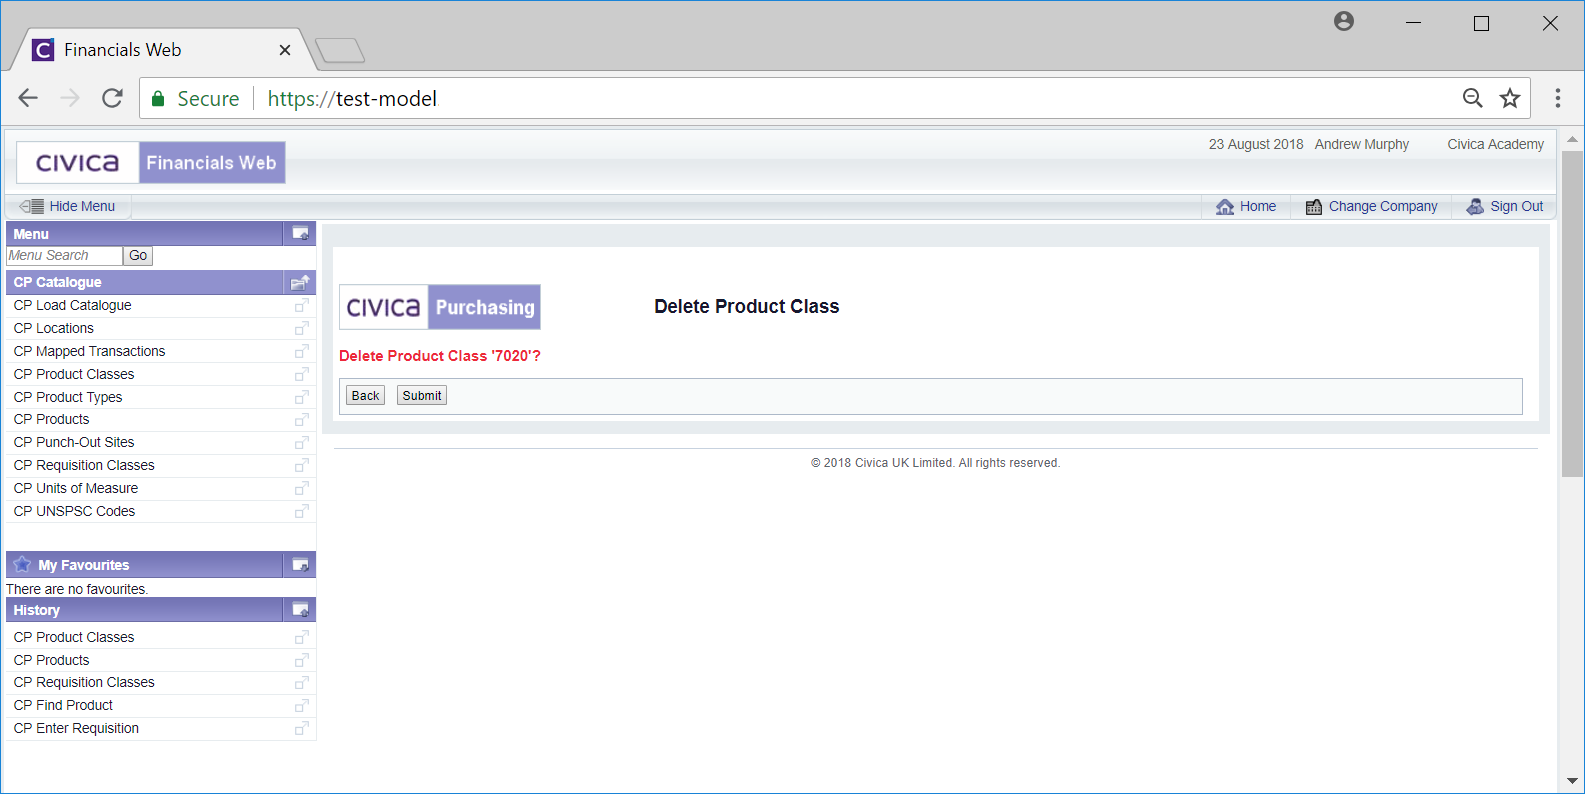
Click on the button to return to the previous screen, i.e. the Edit Product Class form, and the Product Class will not be deleted.
Click on the button to delete the Product Class and you will be returned to the Product Classes screen. Please note: only Product Classes that do not have any linked Products can be deleted.
 : Please ignore this button as the functionality is not currently being used.
 : Click on this button to view any Suppliers that have been linked and/or to link a Supplier to the Product Class. Where Suppliers have been linked, the number of Suppliers linked will be displayed on the button, e.g. where 1 supplier has been linked this button will be displayed as
  . The Product Class - Linked Suppliers screen will be displayed, which is further detailed in the Linking Suppliers section.
 : Please ignore this option as the functionality is not being used.