Once items have been added to the Requisition you will be directed to the Requisition Review screen where you can review the Requisition:
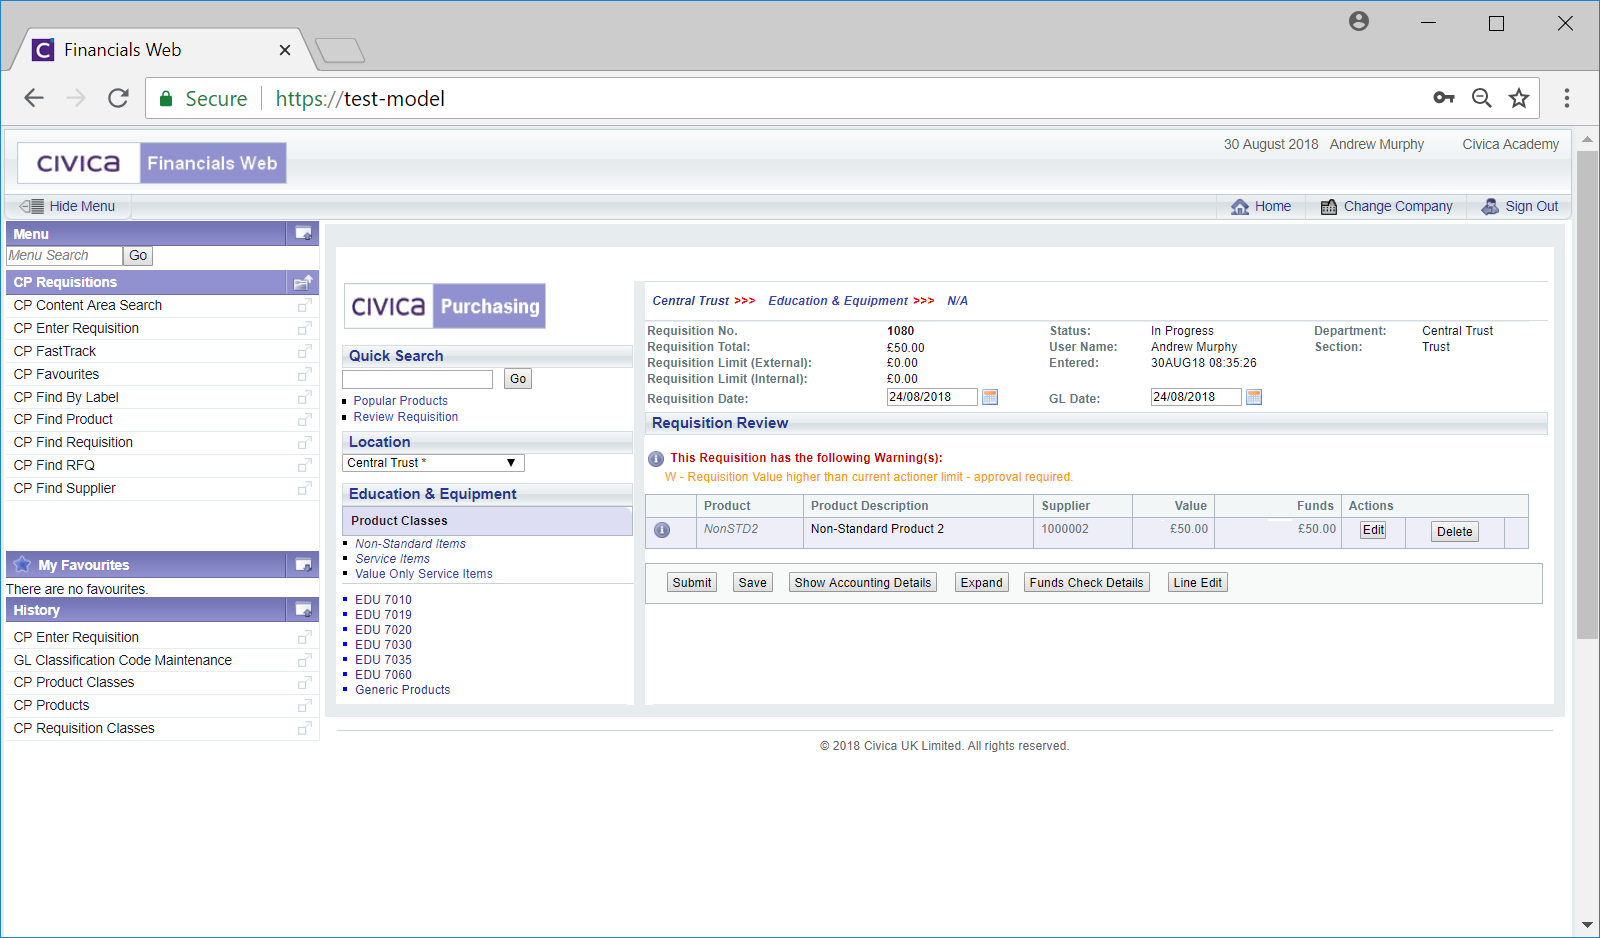
In the above example a warning is displayed:

When this is displayed it means the requisition is above the user's approval limit and will require approval.
On this screen you can change the Requisition Date and/or the GL Date, if required.
The buttons available on the the Line for each product are:
 : Clicking on this button against a Line will open the Item Amendment screen allowing you to make amendments to the Line. The screen will be different dependant on the type of item that is included in the Line and is further detailed in the Amending Requisitions section.
 : Clicking on this button on the Requisition Review screen will remove the Product from the Requisition. A message will be displayed asking for confirmation that the item is to be removed.
The other buttons available at the bottom of the Requisition Review screen are:
 : This will save the any changes made to the Requisition Review screen.
 : Initially the Product Code on each line will be displayed. Clicking on this button will replace these codes with the Ledger Code details This button will also be replaced by a
  button and clicking on this button will display the Product Codes instead of the Ledger Codes.
 : This button would normally display full details of any dissected lines, i.e. where any Lines have been charged out to more than one Cost Centre and Detail Code. Please Note: This functionality is not currently available.
 : Will submit the Requisition and a Create Purchase Order screen will be displayed:
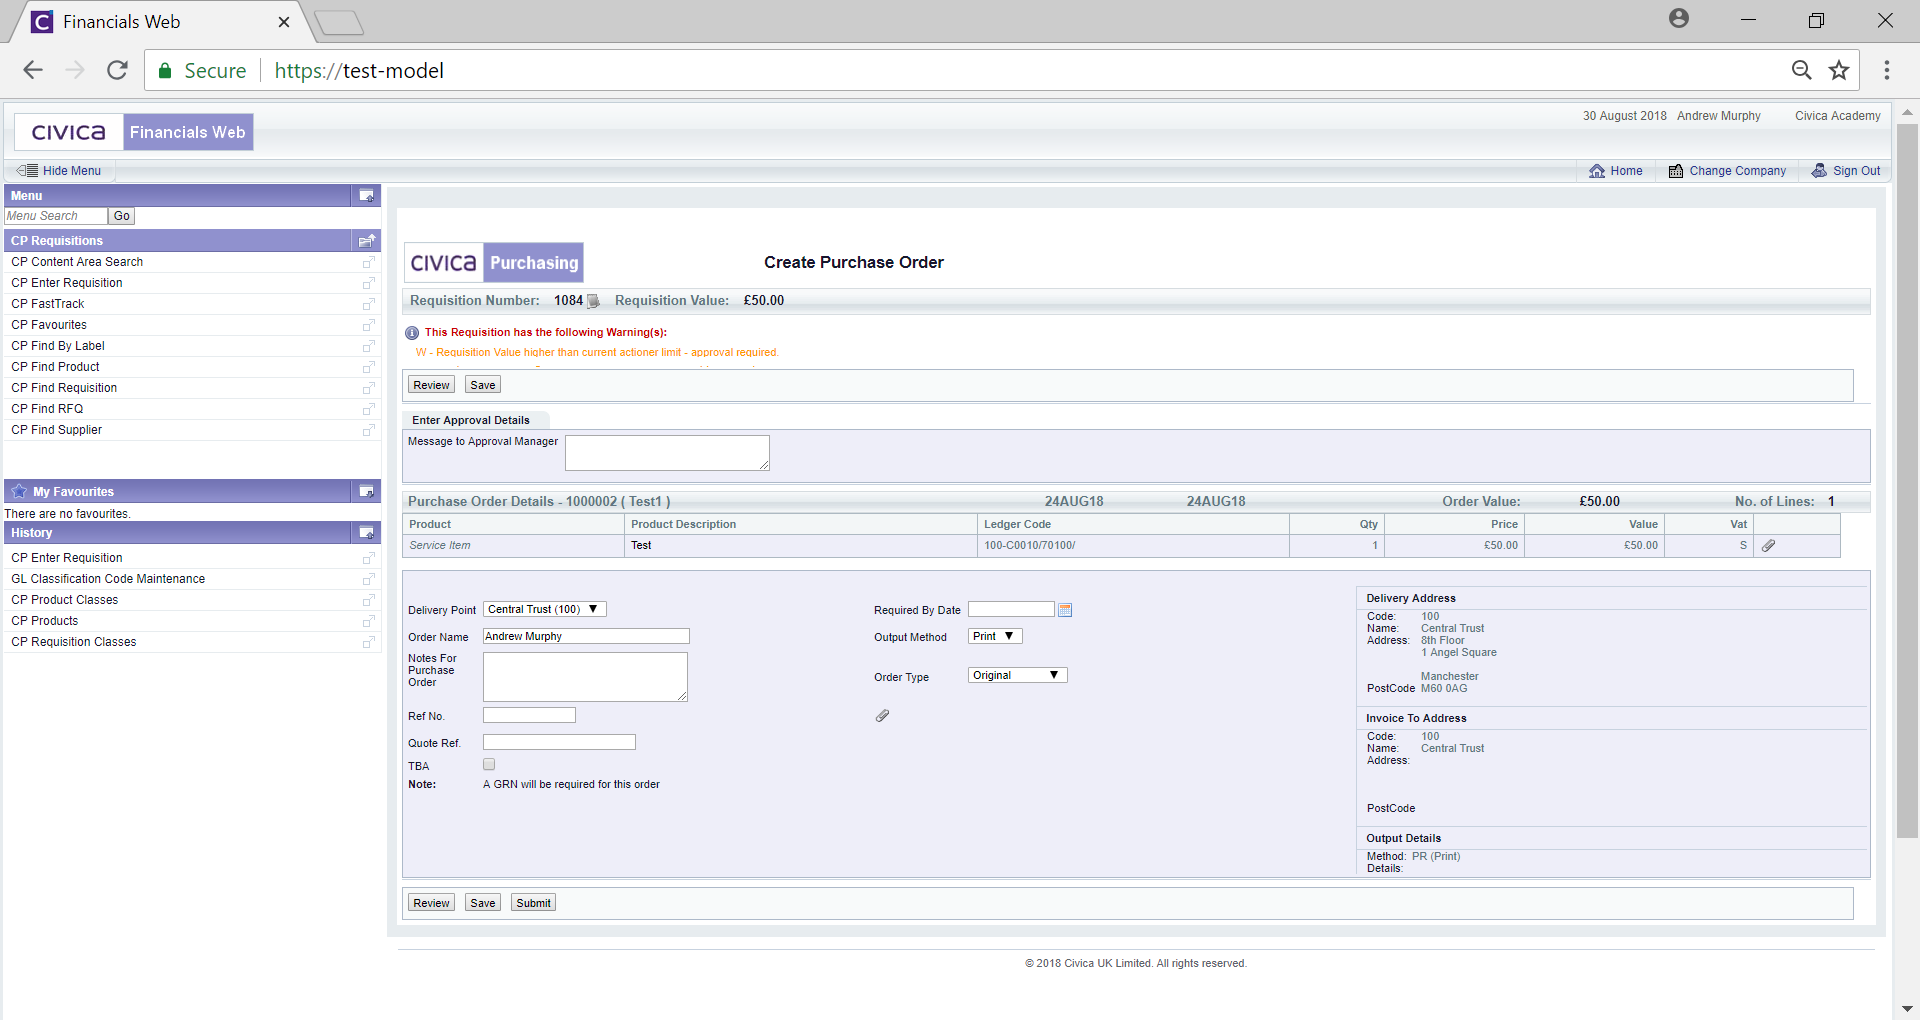
This screen details the lines in the Requisition as well as the following:
- Message to Approval Manager: Click in this box to add a message to the Manager approving the Requisition
- Delivery Point: This is a drop-down field detailing where the Products will be delivered and will be pre-populated with your default address. This can be changed if you have more than one delivery address
- Order Name: This will be pre-populated with your name, i.e. the user that created the Requisition, and can be amended if required. This will be included as part of the Delivery Address on the Purchase Order, i.e. FAO.
- Notes for Purchase Order: Click in this box to add any notes required to be added to the Purchase Order
- Ref No: Add any reference number that is required. This could be an internal reference or the name of the sales person and will be added to the Purchase Order.
- Quote Reference: Add any reference with regard to a quote, if required. This will be added to the Purchase Order.
- TBA: This tick box is only available if set up for Crystal Reports if required not to print the values on the Purchase Order. If you require this facility please contact your Account Manager.
- Note: This note is a reminder to create a GRN (Good Receipt Note) when the goods are received.
- Required by Date: Add the date the Products are to be delivered by. This can be added manually or via the Calender option and will be included on the Purchase Order.
- Output Method: This is a drop down field with options to Print, E-mail and Print or Email the Purchase Order
- Order Type: This drop-down field has options of:
Original: The original order
Confirmation: A paper confirmation order, e.g. for an order made over the telephone
Memorandum: This will only add a record to the system for circumstances where the Supplier does not need a document, e.g. delivery has already taken place or the order was done over the telephone.
- Attachment: Clicking on the attachment icon
 will allow you to add a document to the Purchase Order, e.g. a quote that you have received. This icon may also be available on the Product line/
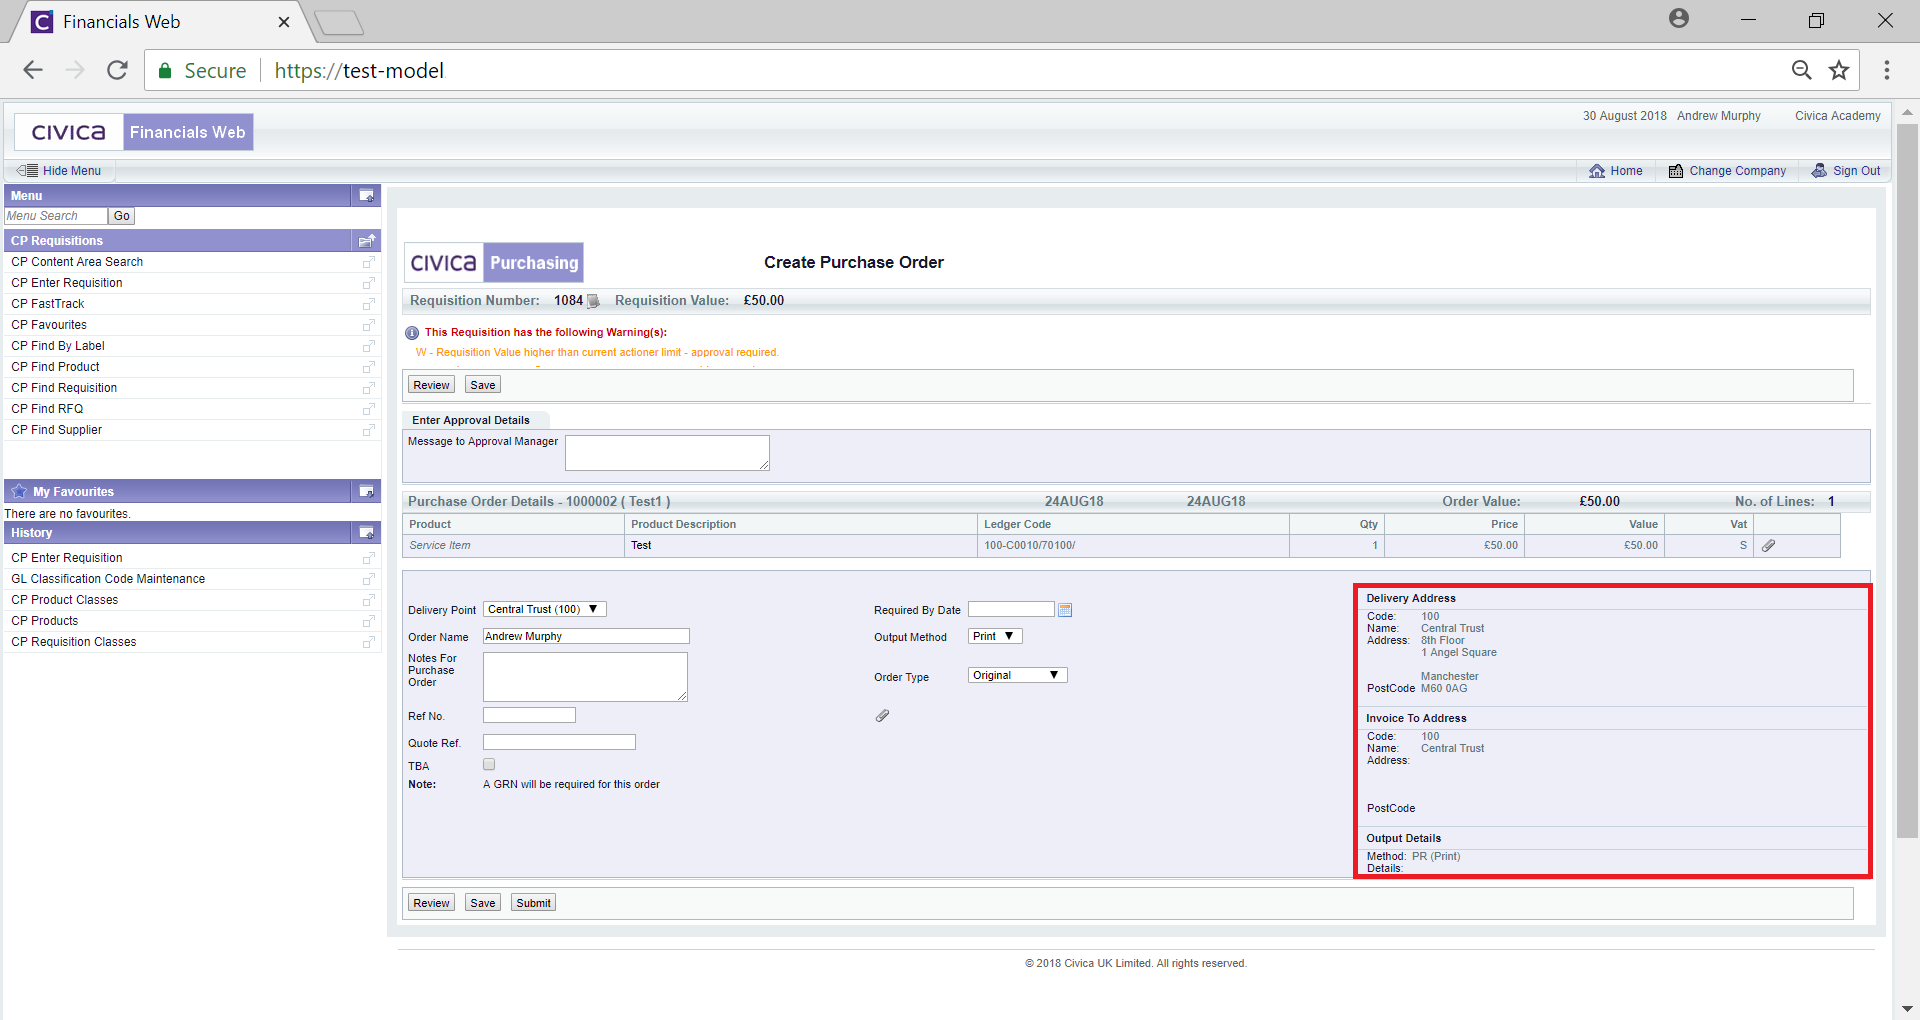
There is also a summary on the right of the screen detailing the Delivery Address, the Invoice To Address and the Output Details:
The following buttons are also available:
 : This button is available at the top and the bottom of the screen. Clicking on this button will take you back to the Requisition Review screen.
- : Clicking on this button will save any changes that you have made to this screen and return you to the Requisition Review screen.
- : This button is available at the top and the bottom of the screen. Clicking on this button will submit the Requisition and the Requisition Confirmation screen will be displayed. If no approval is required this screen will confirm that a Purchase Order has been created or that it has been forwarded for approval:
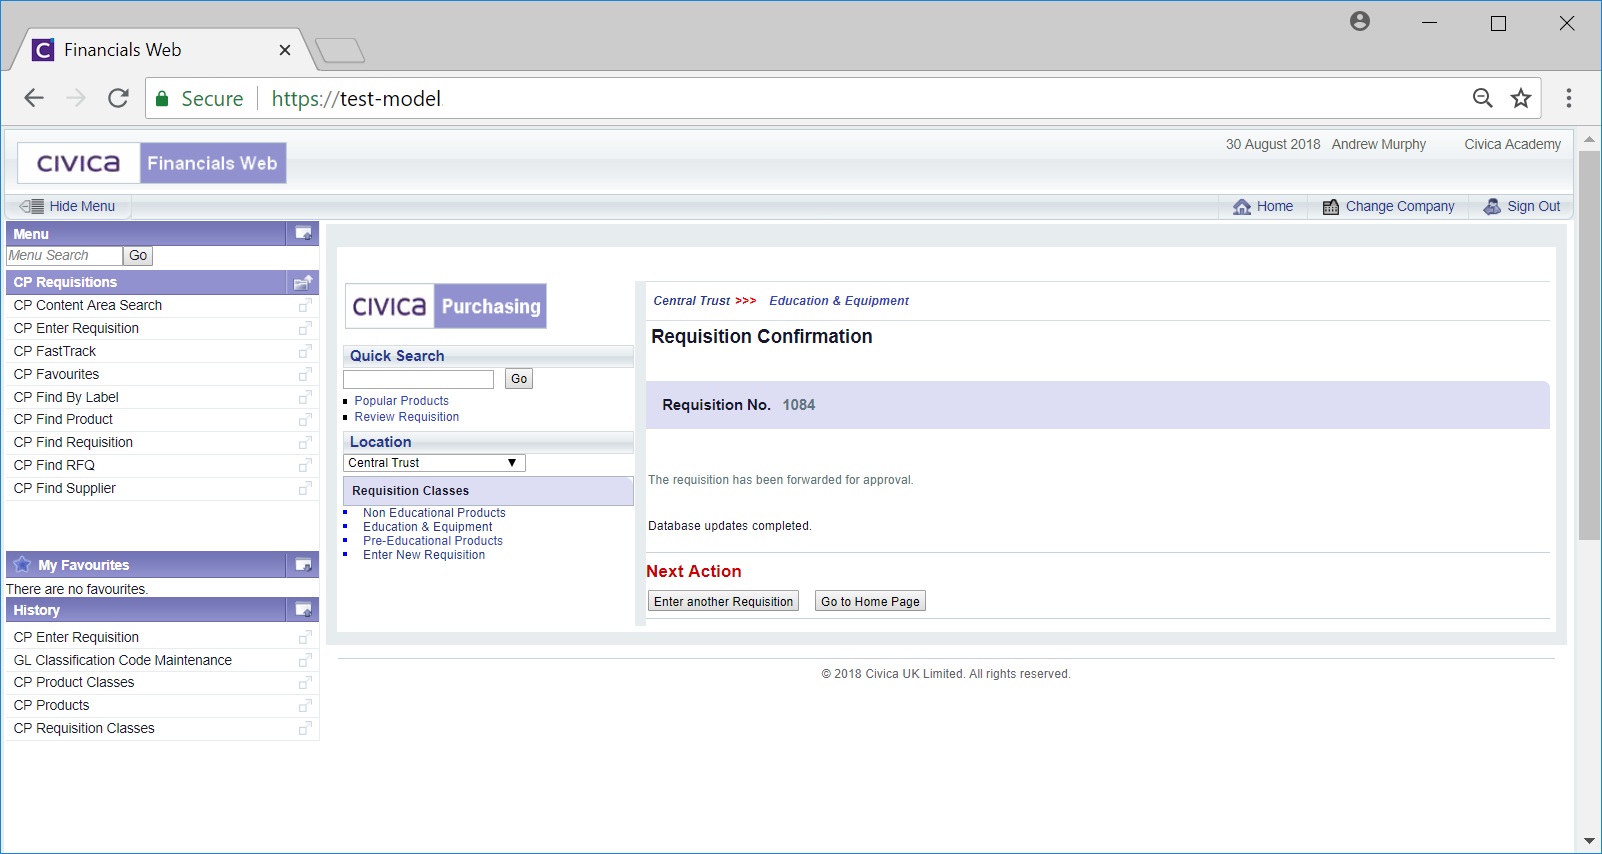
On this screen you can create another Requisition by clicking on the  button, which will return you to the Adding Requisition screen as detailed in the Creating a Requisition section.
Alternatively clicking on the  button will direct you to the Home Page screen, as detailed in the Home Page section.
Details on how to Approve a Requisition can be found in the Approving Requisitions section.