To maintain a Requisition Class click on the Catalogue option in the Purchasing menu:
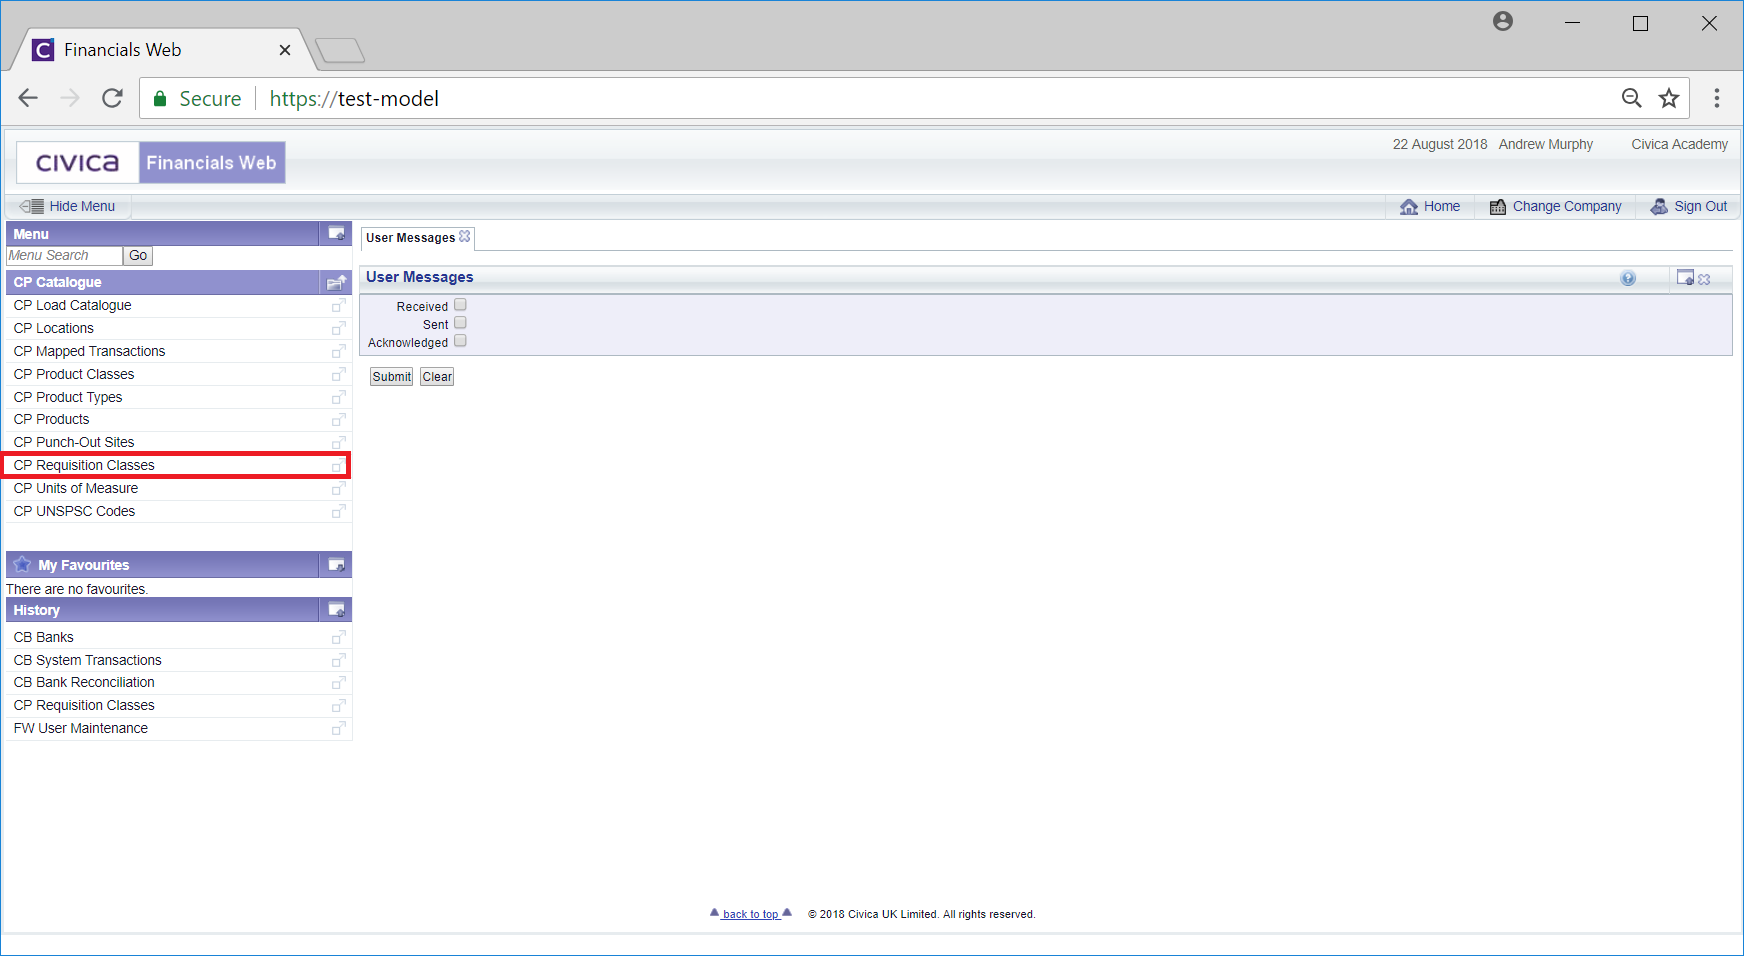
Then select the CP Requisition Classes menu option:
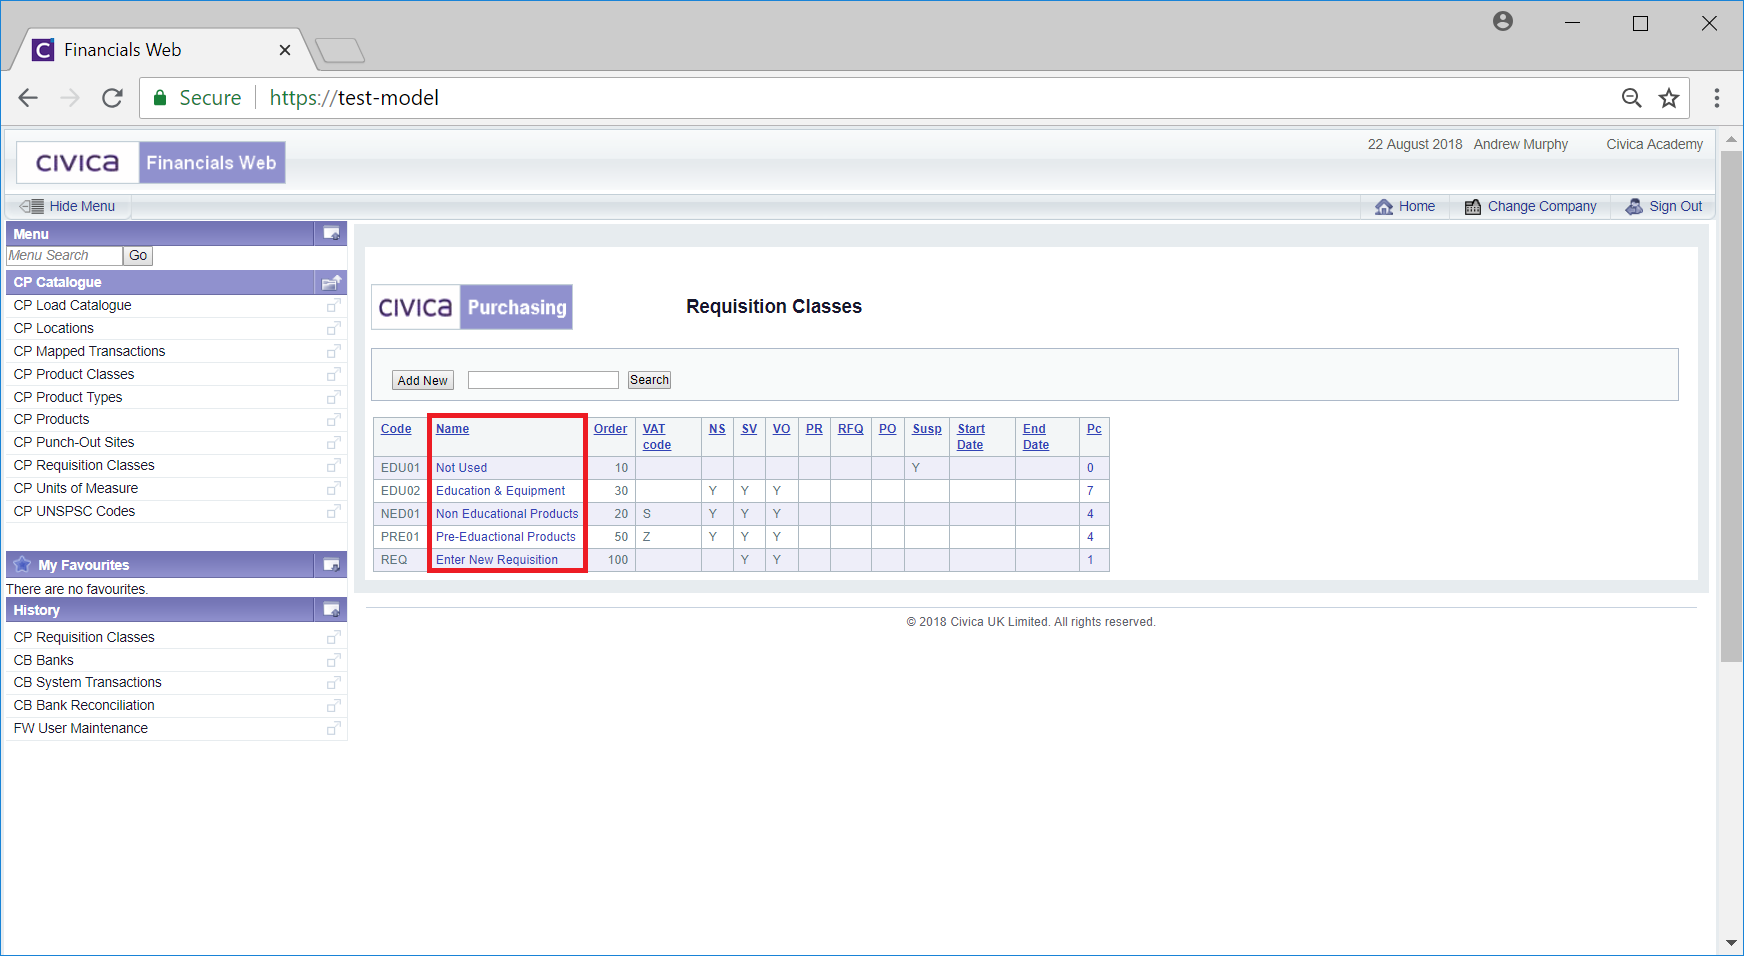
The Requisition Classes screen will open:
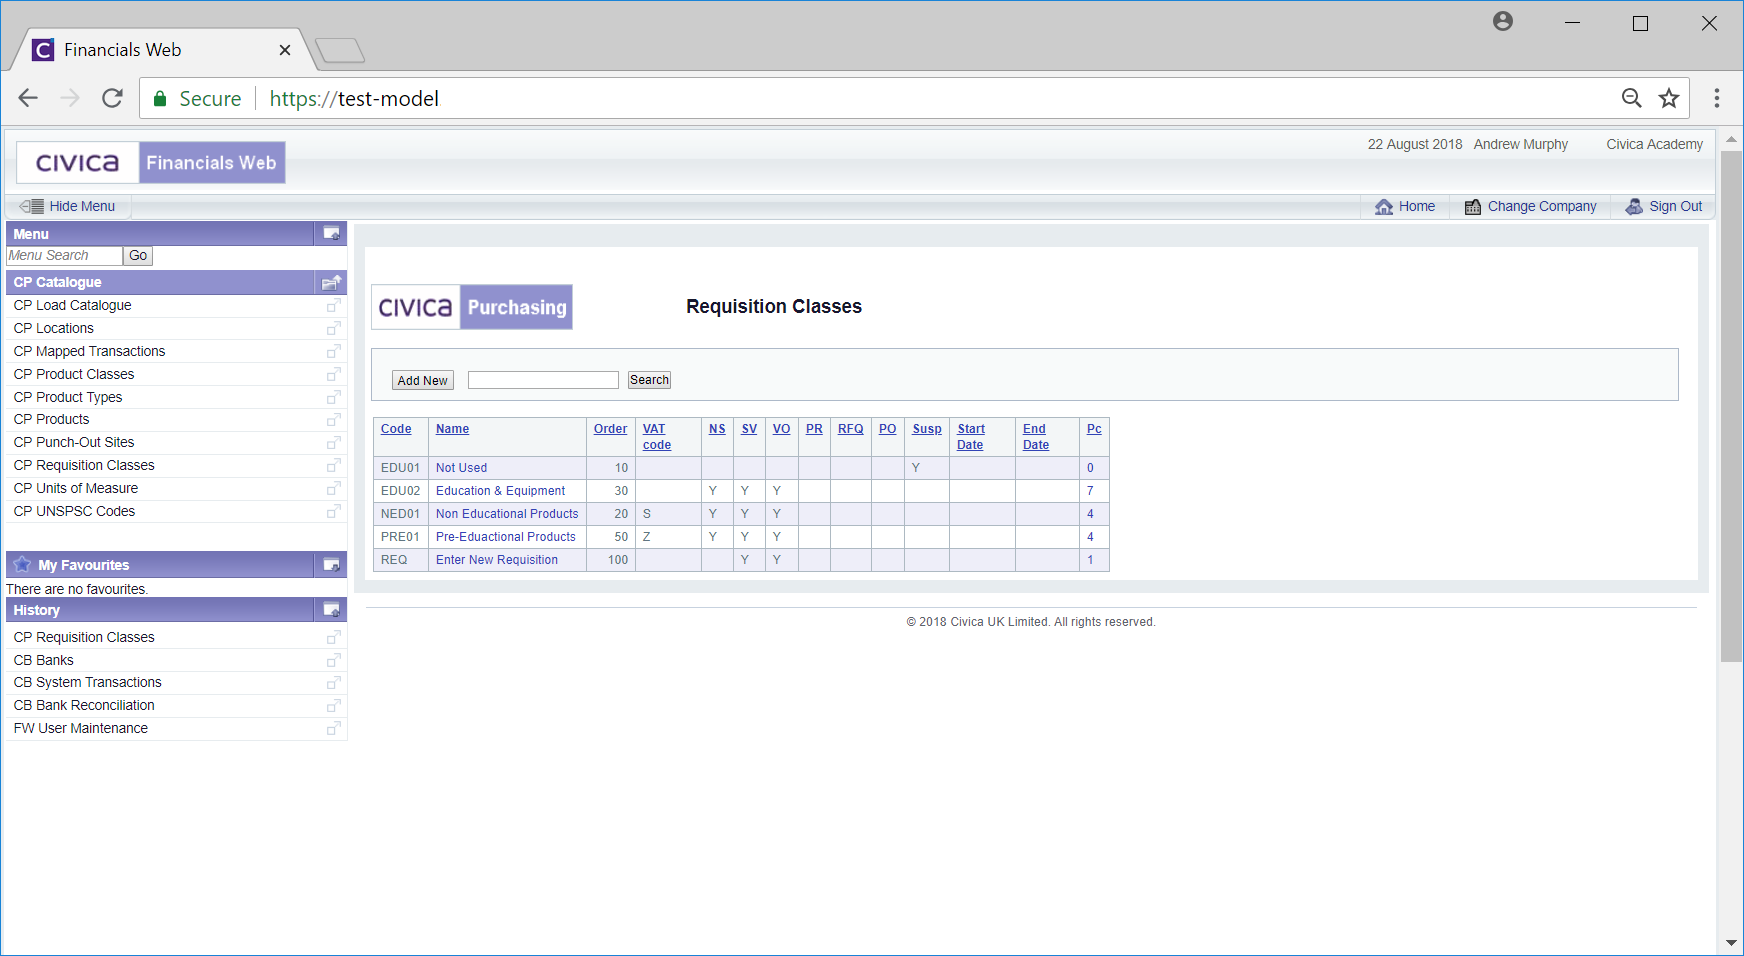
This Grid on the screen displays all the current Requisition Classes.
If a substantial number of Requisition Classes appear on the Grid, add the name or part name of the Requisition and click on the  button. The Grid will be refreshed with items that contain the search criteria in the Name column.
Select the required Requisition Class by clicking on the link in the Name column in the Grid on the Requisition Classes screen:
This will open the Edit Requisition Class form:
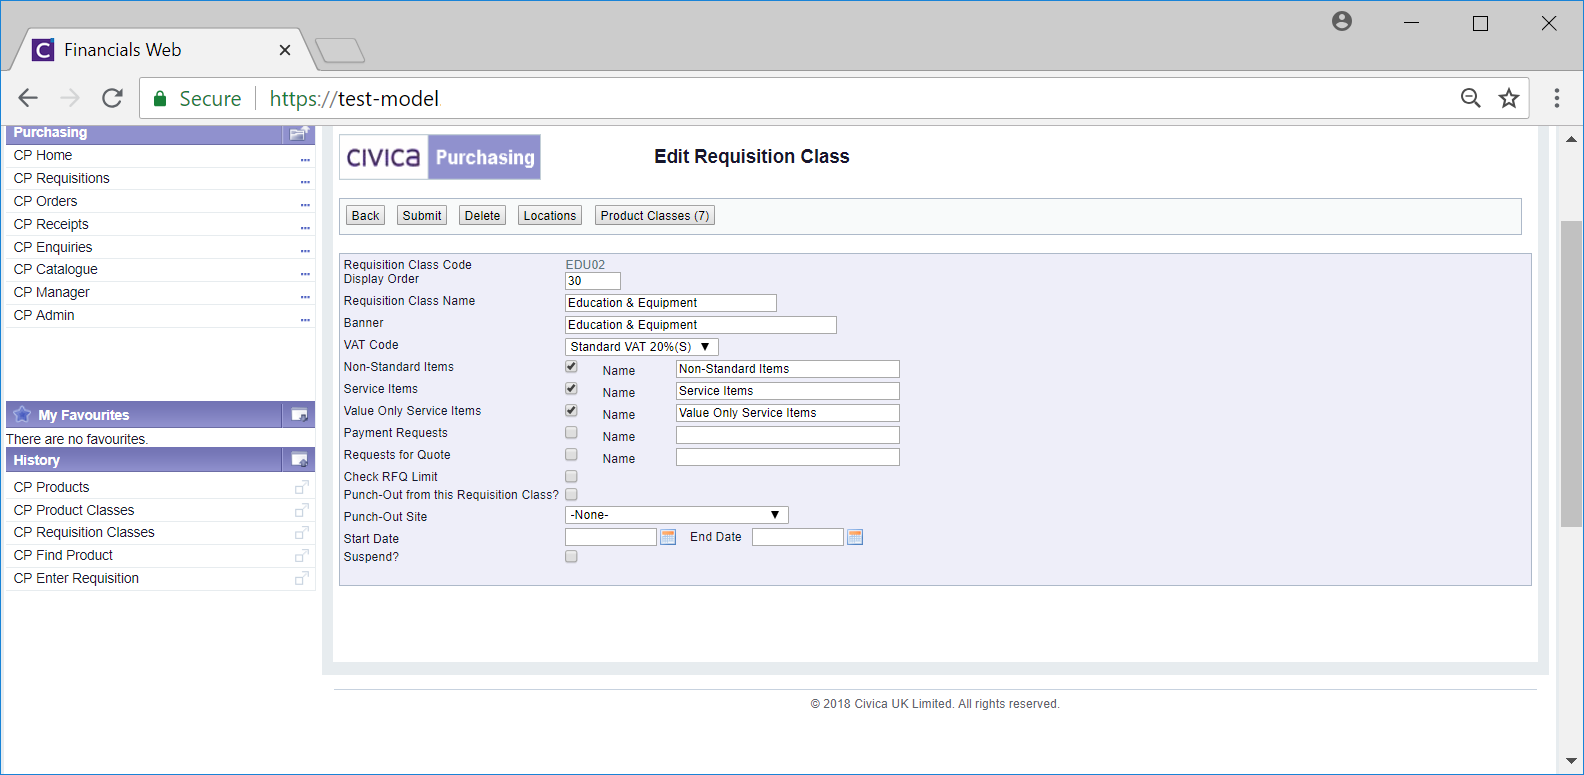
The fields on this screen are as follows:
- Requisition Class Code: This is the code for the Requisition Class and cannot be amended.
- Requisition Class Name: This is the name for the Requisition Class, which can be amended if required.
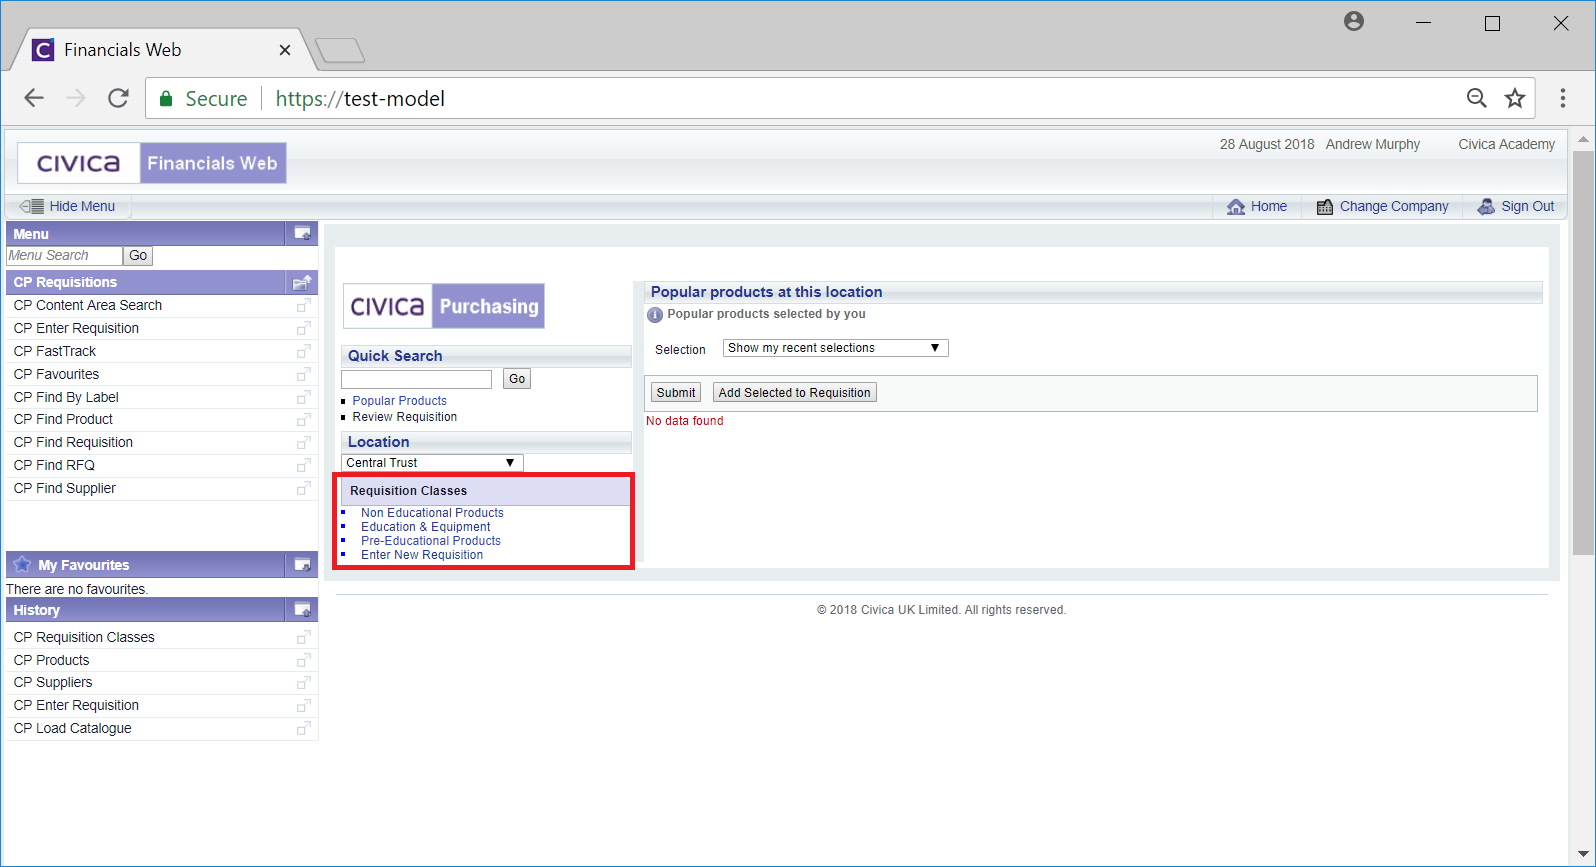
- Display Order: This field is used to display the order of Requisition Classes within the Add Requisition screen, i.e when creating a Requisition a list of Requisition Classes will be displayed:
The display order is defined by the ranking number (a number between 1 and 9999 inclusive) added to the Display Order field. The lower the ranking number, the higher it will appear in the list of Requisition Classes displayed on the list, e.g. 1 will put it to the top of the list.
It is recommended to have gaps between the numbers used if there are a lot of Requisition Classes, e.g. 10, 20, 30 etc.
The number in this field can be amended if required to move it further up or further down the list.
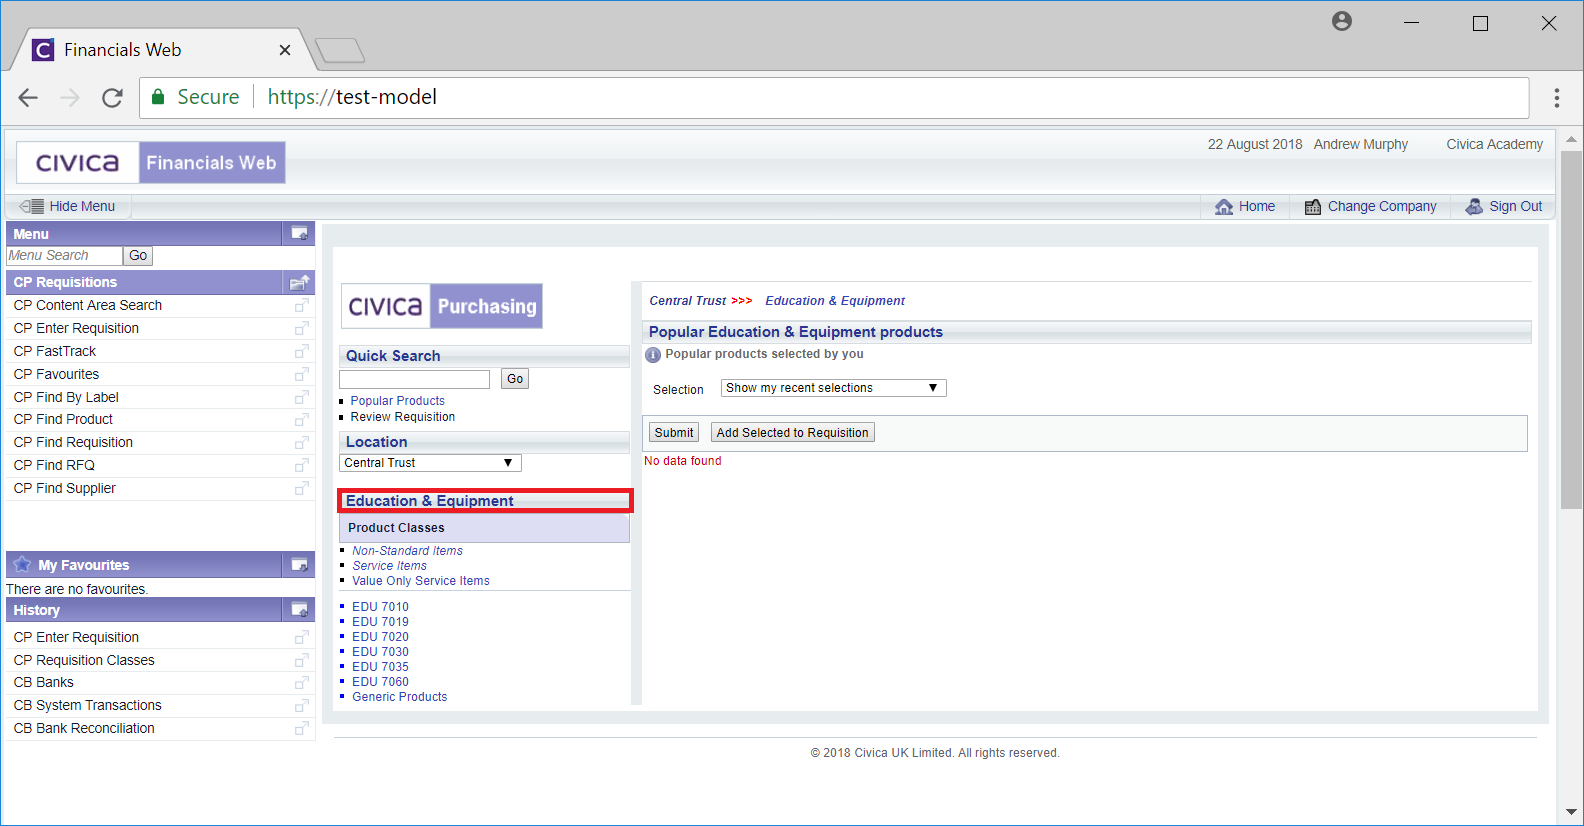
- Banner: The banner name for the Requisition Class will be in this field - the banner name will appear in the heading when selecting a Product Class associated with the Requisition Class in the Add Requisition screen:
The banner name can be amended if require.
- VAT Code: A VAT Code can be added at this level, if required. This will be used when a Product is added to a Requisition and the associated Product Class and the Product itself does not contain a VAT Code.
- Non Standard Items: This tick box will be selected if Non-Standard Products are included in the Requisition Class, i.e. Products that are not Catalogue Products, and if selected a name for the Non-Standard item will be added to the Name field. This name will be displayed under Product Classes in the Add Requisition screen:

Adding Non-Standard Products to a Requisition is further detailed in the Non-Standard Products section.
This option and the Name field can be changed if required.
- Service Items: This tick box will be selected if Service items are to be included in the Requisition Class. This will be displayed under Product Classes in the Add Requisition screen. These items are used where there is no obvious Product Code - where the quantity in units and costs per unit can be added manually. For example Civica may provide consultancy for a day - this could be added a Service Item with a unit of 1 and a cost for this unit.
If selected a name for the Service item will be added to the Name field - this will be displayed under Product Classes in the Add Requisition screen:
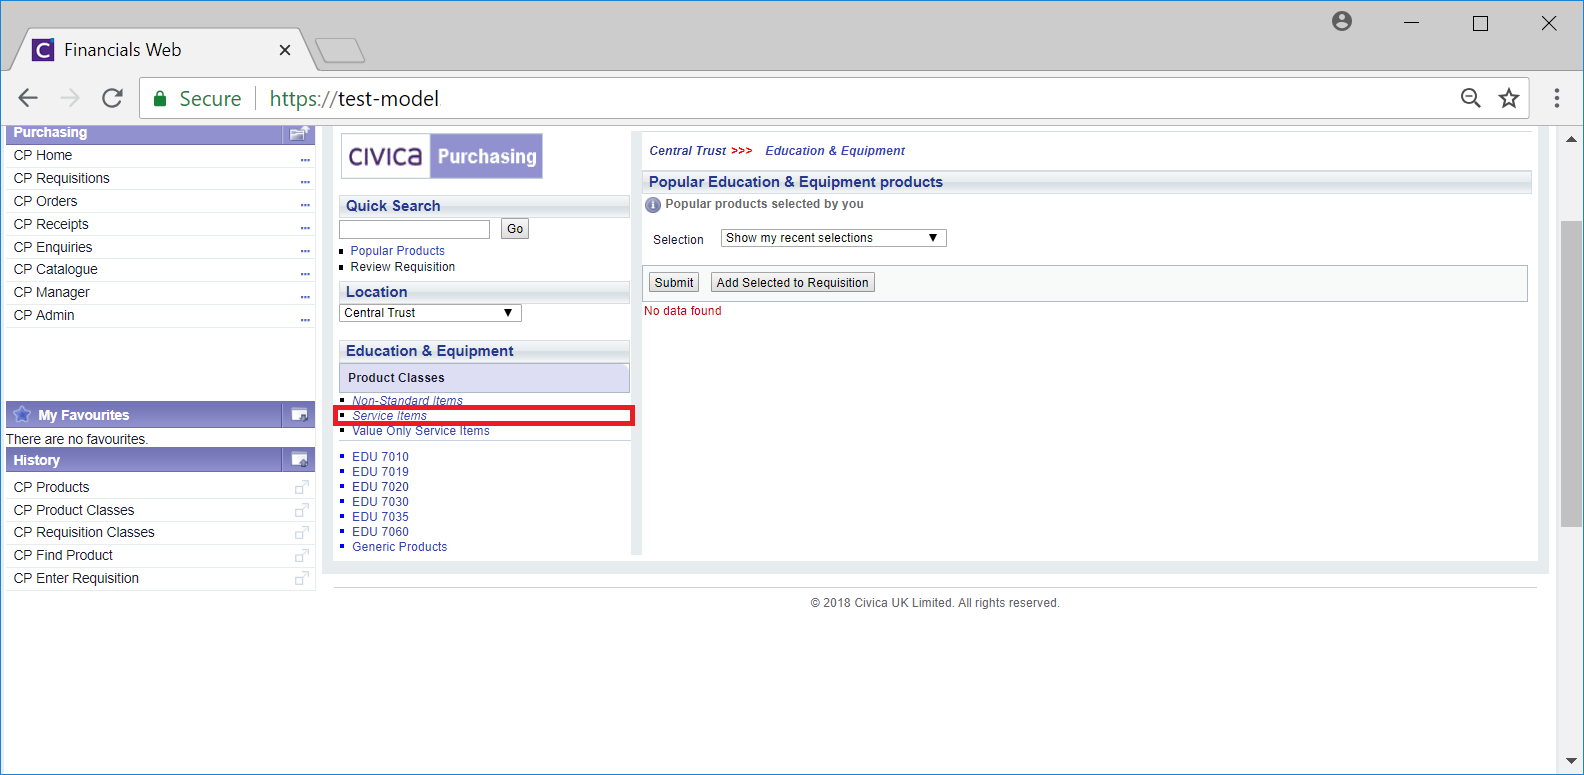
Adding Service items to a Requisition is further detailed in the Service Items section. If this option is selected.
This option and the Name field can be changed if required.
- Value Only Service Items: This tick box will be selected if Value Only Service items are to be included in the Requisition Class. These item are the same as Service items but there is no quantity. For example a subscription to an educational magazine could be a Value Only Service Item as no quantity is added.
If selected a name for the Value Only Service item will be added to the Name field - this will be displayed under Product Classes in the Add Requisition screen:
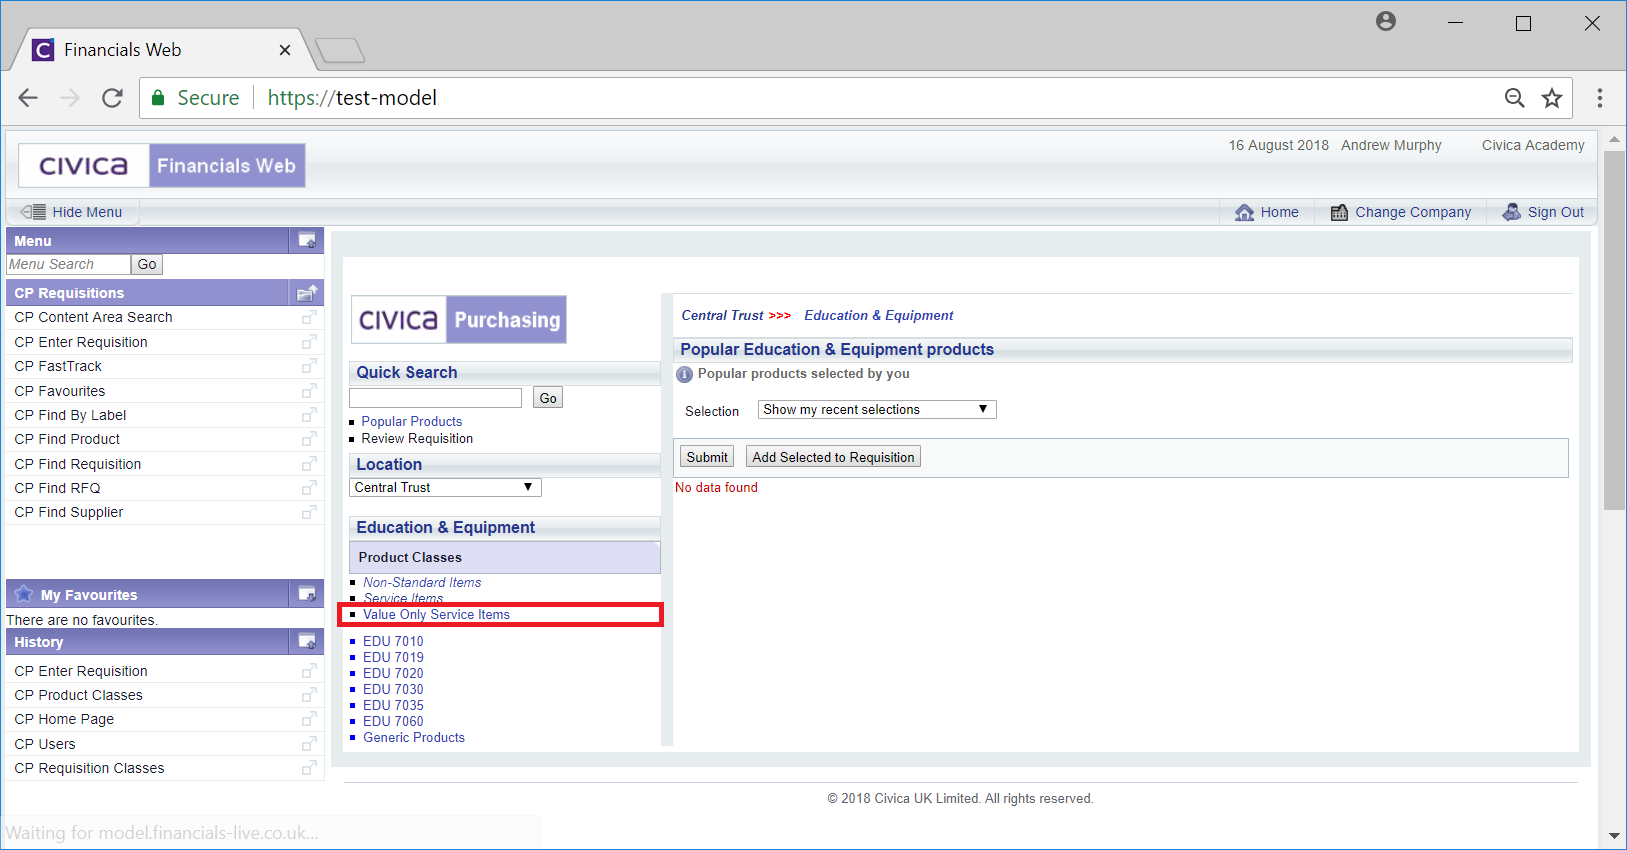
Adding Value Only Service items to a Requisition is further detailed in the Value Only Service Items section.
This option and the Name field can be changed if required.
- Payment Request: Ignore this option as this functionality is not being used.
- Requests for Quotes: Ignore this option as this functionality is not being used.
- Check RFQ Limit: Ignore this field is this functionality is not being used.
- Is this a Punch-Out Requisition Class: Ignore this option as this functionality is not currently being used.
- Start Date & End Date: A Start Date may have been to control when the Requisition Class will be available and an End Date may have been added to control when it will no longer be available. In effect limiting when this Requisition Class is available.
If blank it indicated that the Requisition Class is to be used continually.
These fields can be amended if required.
- Suspend: This tick box will be selected if the Requisition Class has been suspended - it will not be available for the user to select. It can be changed if required.
The following buttons are also available:
 : The Requisition Class should be are assigned to locations so users with these locations can access the Requisition Class on the Add Requisition screen. Clicking on this button will open the Requisition Class/Locations screen. This is further detailed in the Locations section.
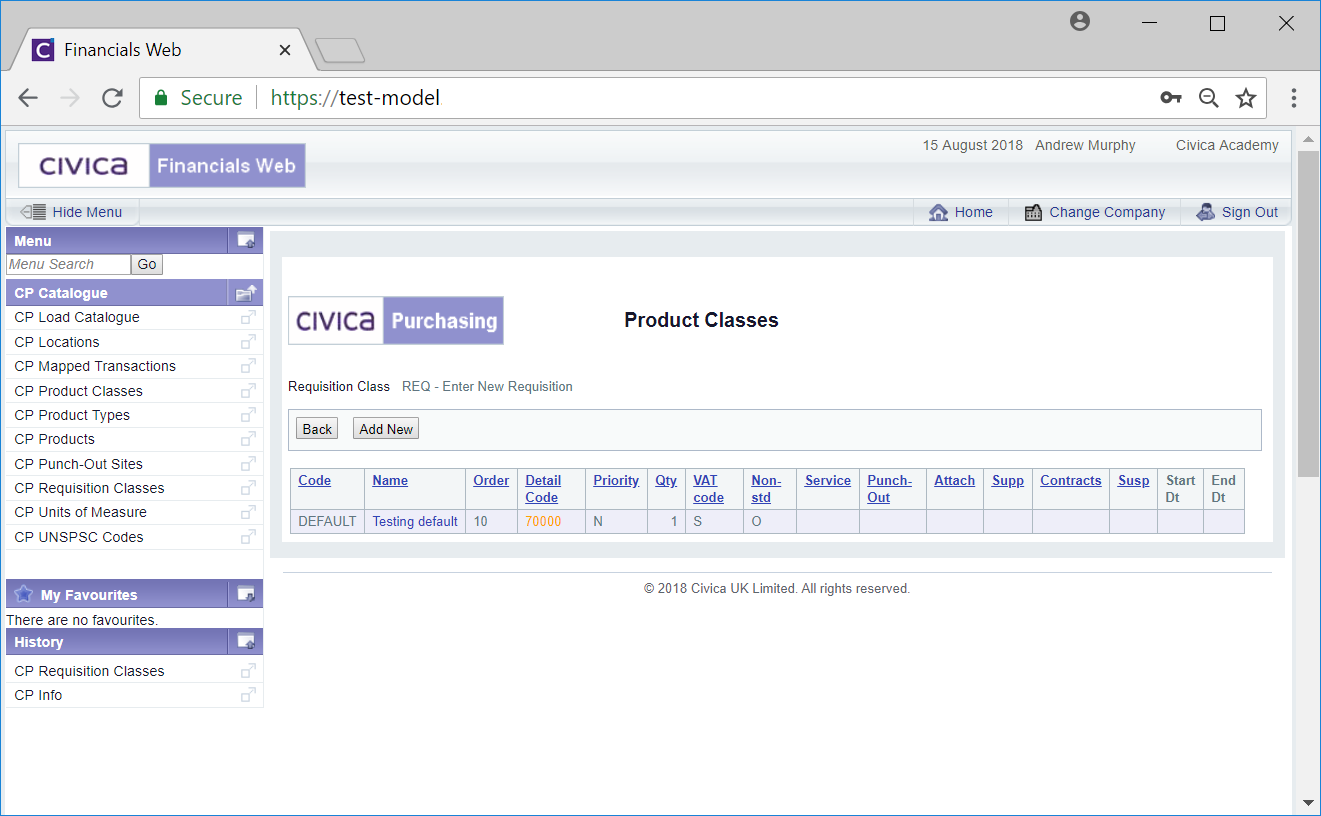
 : This button will display the number of Product Classes that have been linked to the Requisition Class, in this example only one Product Class has been linked - when the Requisition Class is created it may be linked to a default Product Class.
It is useful to link Product Classes to a Requisition Class as you may need to amend all Product Classes associated with a Requisition Class. Linking them in this way will allow you to find them easily.
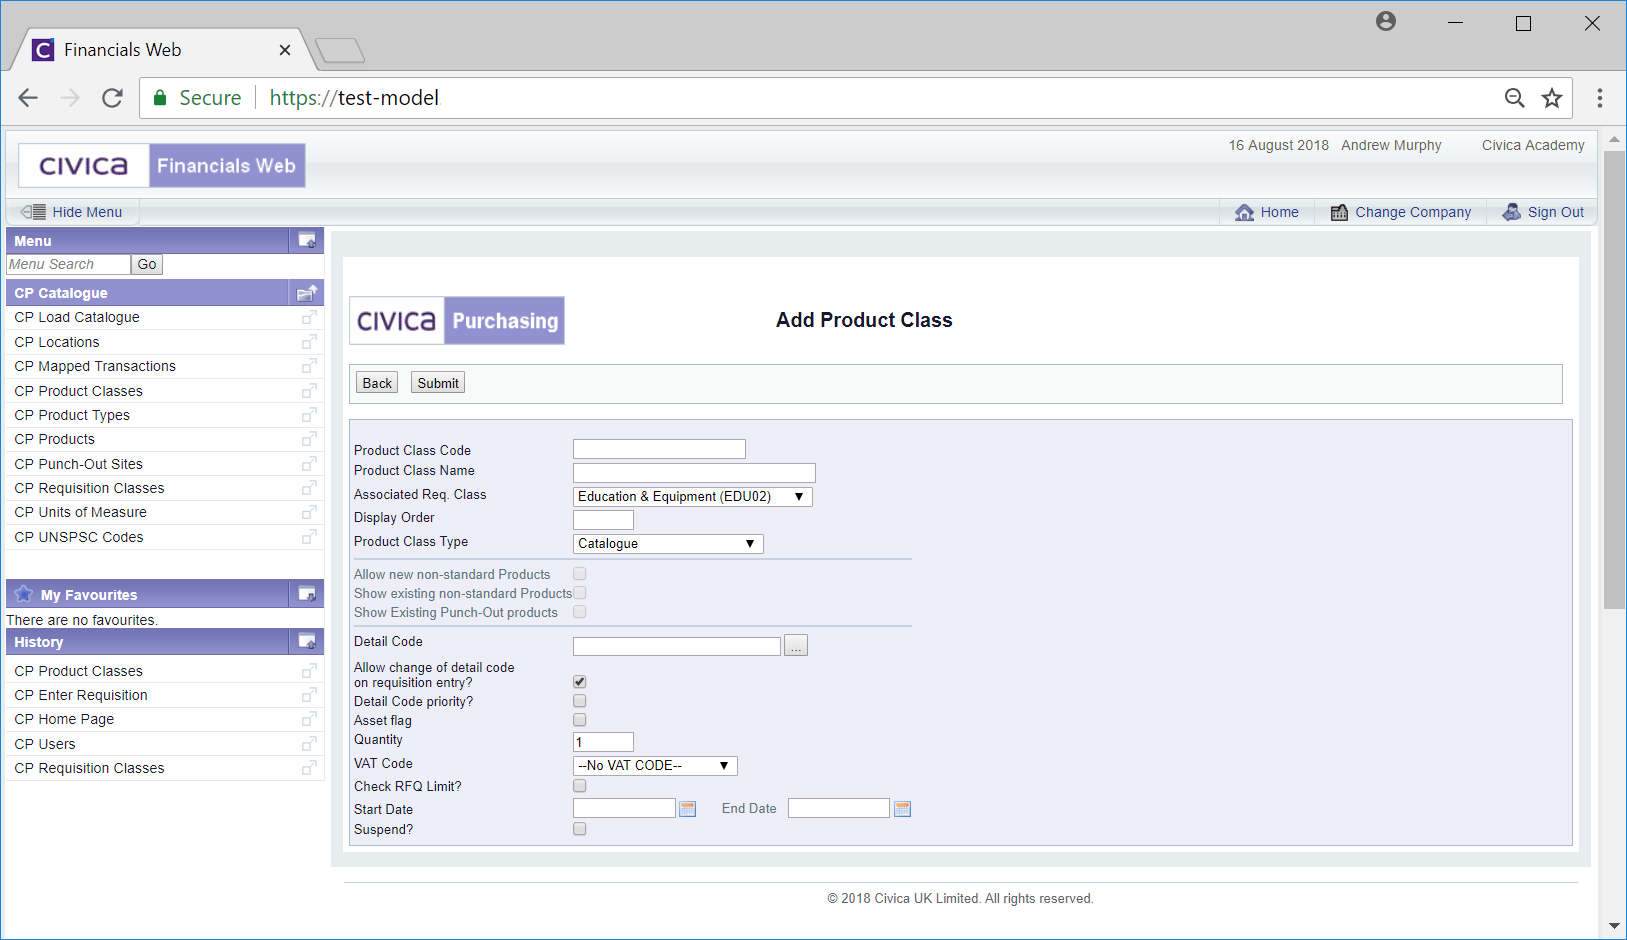
Clicking on this button will open the Product Classes screen:
Click on the  button to link a new Product Class to the Requisition Class. The Add Product Class form will open, which is further detailed in the Creating Product Classes section.