Once goods have been received a Goods Receipt Note can be added to the Purchase Order on the Receive Goods form, which is detailed in full below.
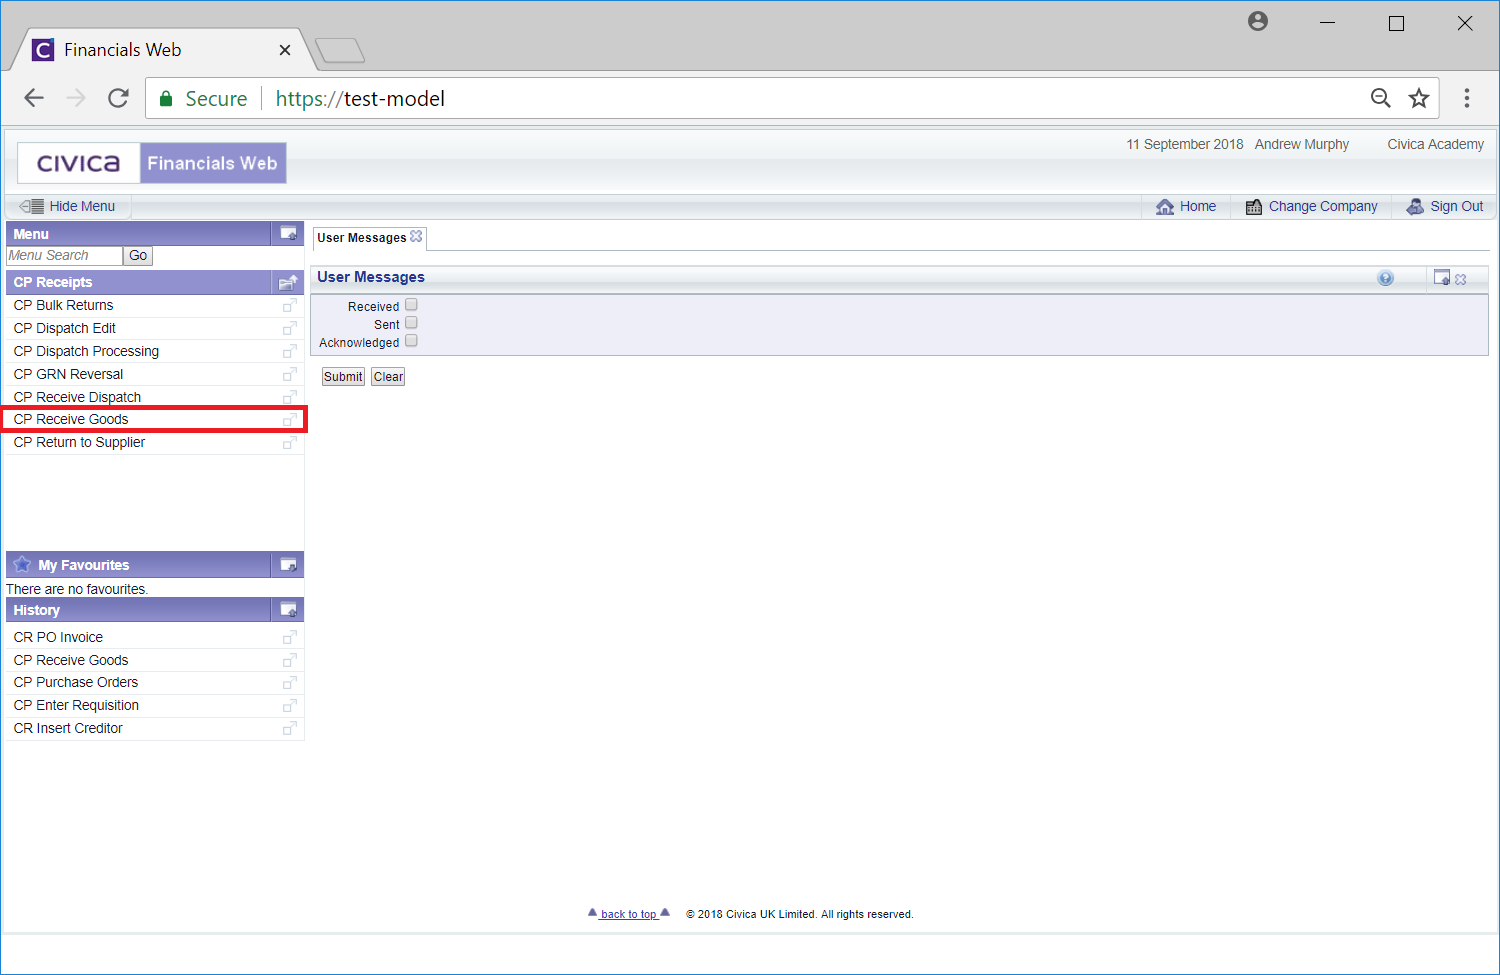
Click on the CP Receipts option on the Purchasing menu:

Then the CP Receive Goods option:
The Receive Goods form will be displayed:
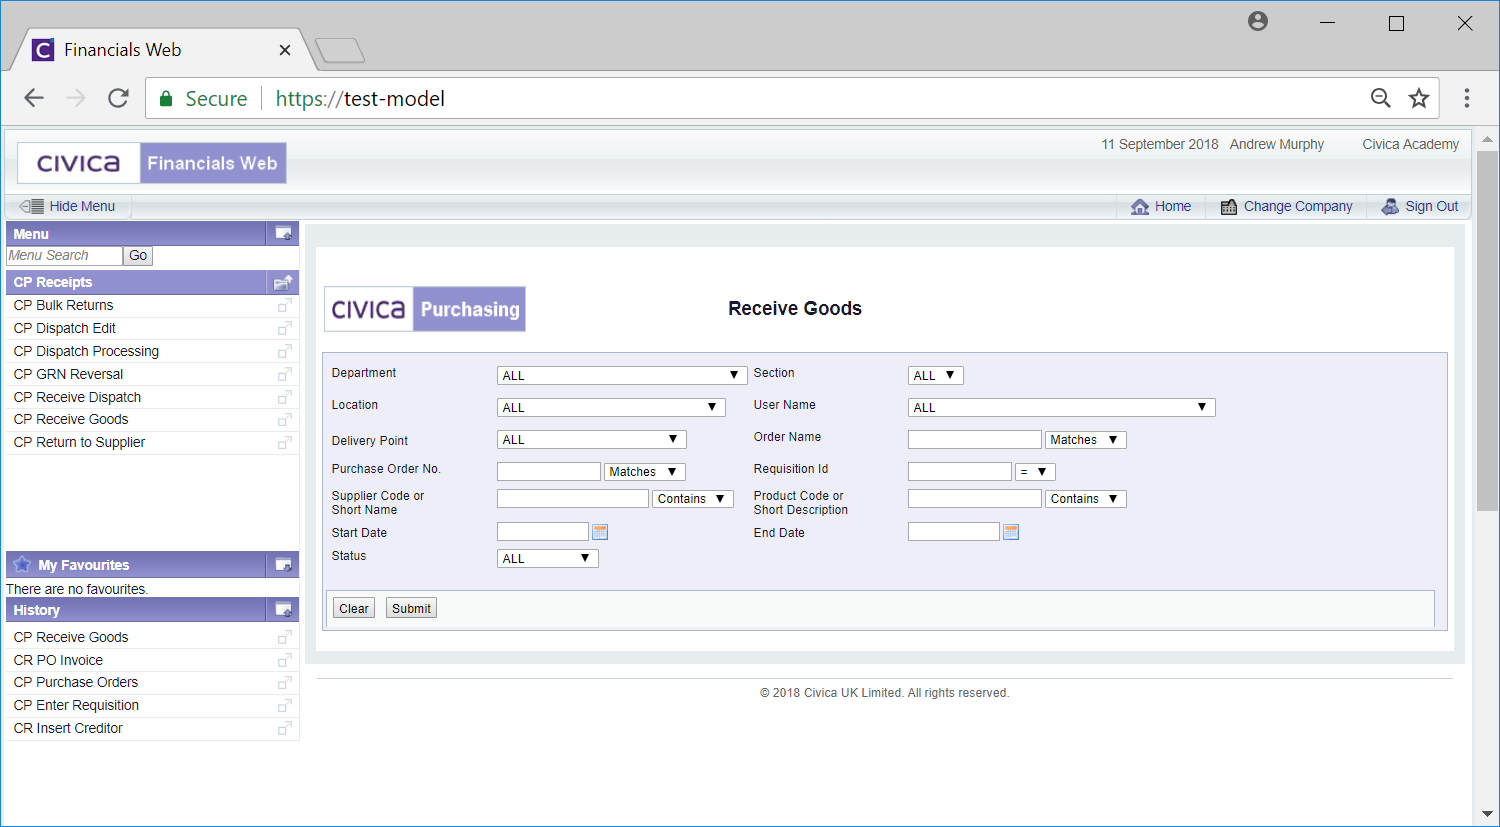
This form allows you to search for and select the required Purchase Order for the Goods Receipt Note to be added.
The drop-down options to the right of the first four fields provide you with further options for the search. These are:
- Begins: The search should only include items that begin with the criteria added to the field.
- Contains: The search should only include items that contain the criteria added to the field.
- Ends: The search should only include items that ends with the criteria added to the field.
- Matches: The search should only contain items that match the criteria added to the field.
Add the relevant search criteria to the fields on the form as required.
Clicking on the  button will remove any search criteria added, the fields will revert to their default values allowing you to add fresh search criteria.
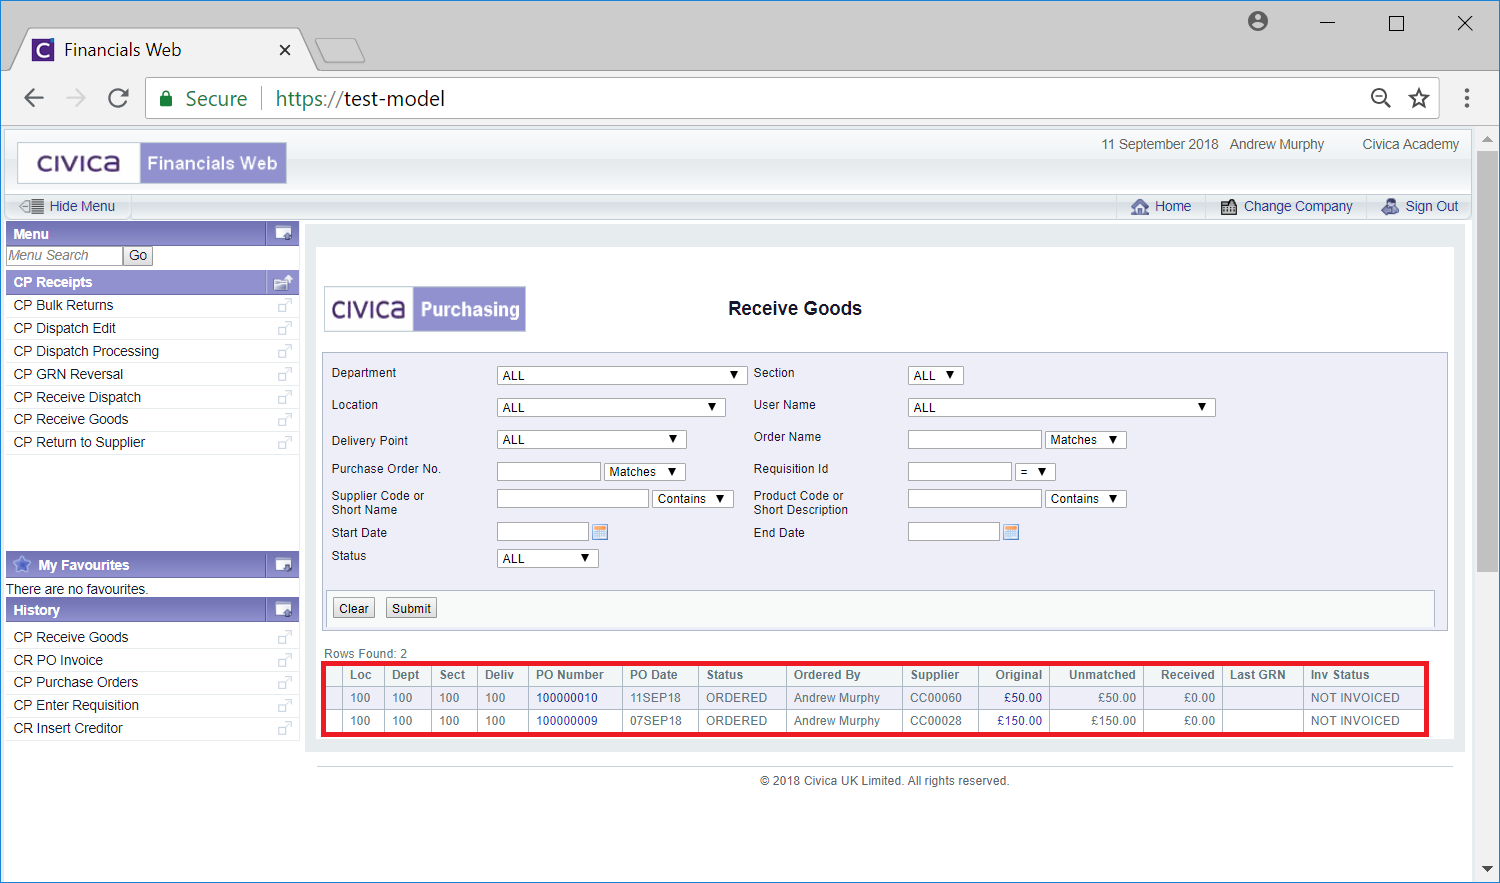
Click on the  button and a Grid will be displayed at the bottom of the form with Purchase Orders that meet the search criteria - if no search criteria is added all available Purchase Orders will be displayed in the Grid:
New search criteria can be added and re-clicking on the button will refresh the lines in the Grid with Purchase Orders that meet the new search criteria.
Clicking on the button will clear the fields on the form and also now remove the Grid.
To view details of a Purchase Order click on the link in the Original column on the Grid:

This will open the Purchase Order Details screen, which is further detailed in the Purchase Order Details section.
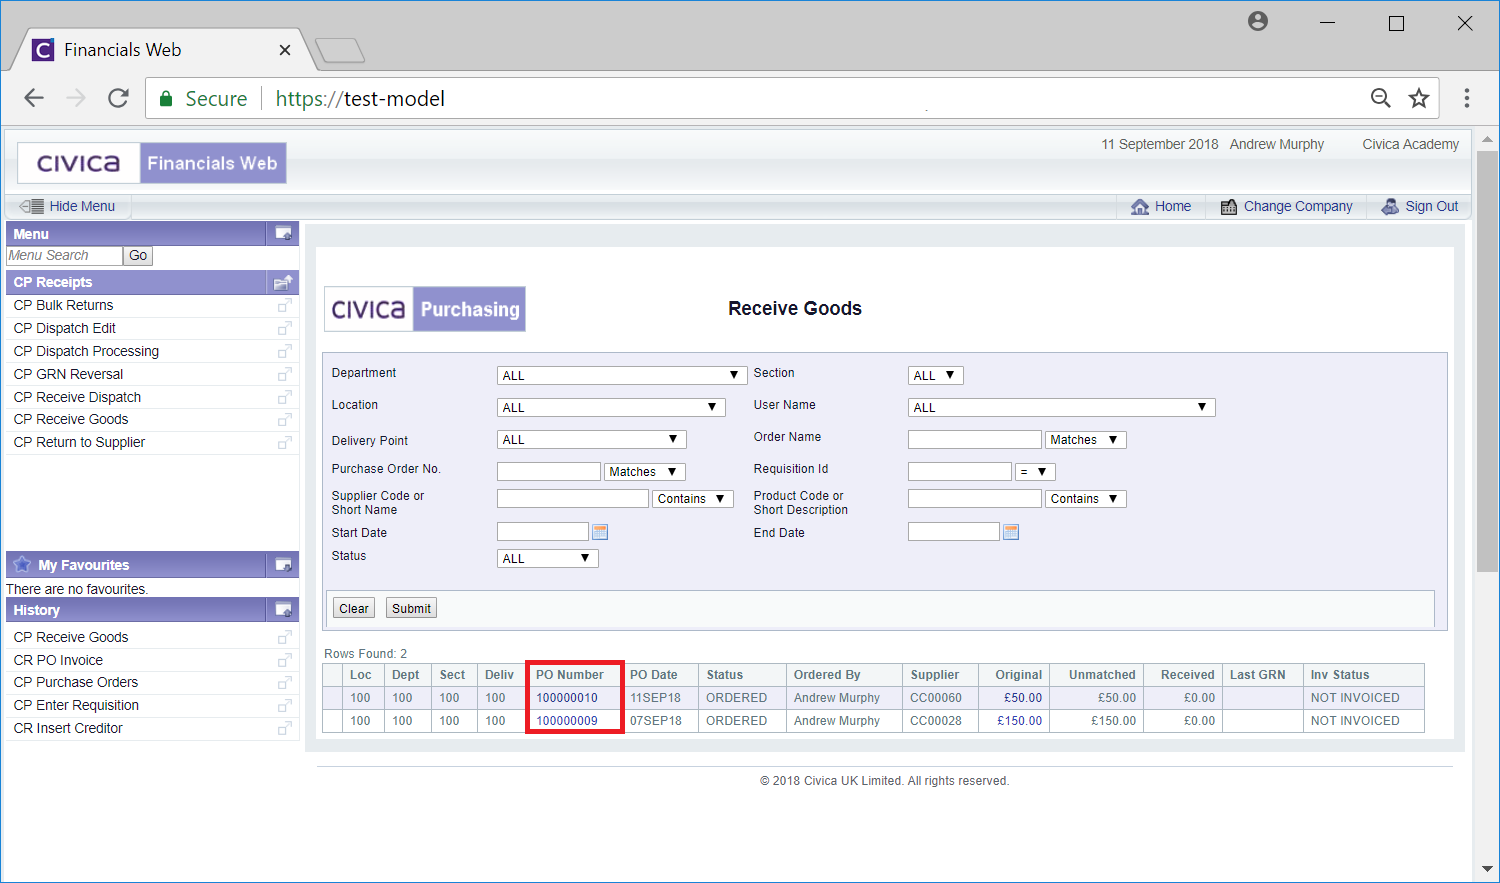
Select the required Purchase Order by clicking on the link in the PO Number column in the Grid:
The Purchase Order Details screen will open but will have an additional  button located at the top of the screen:
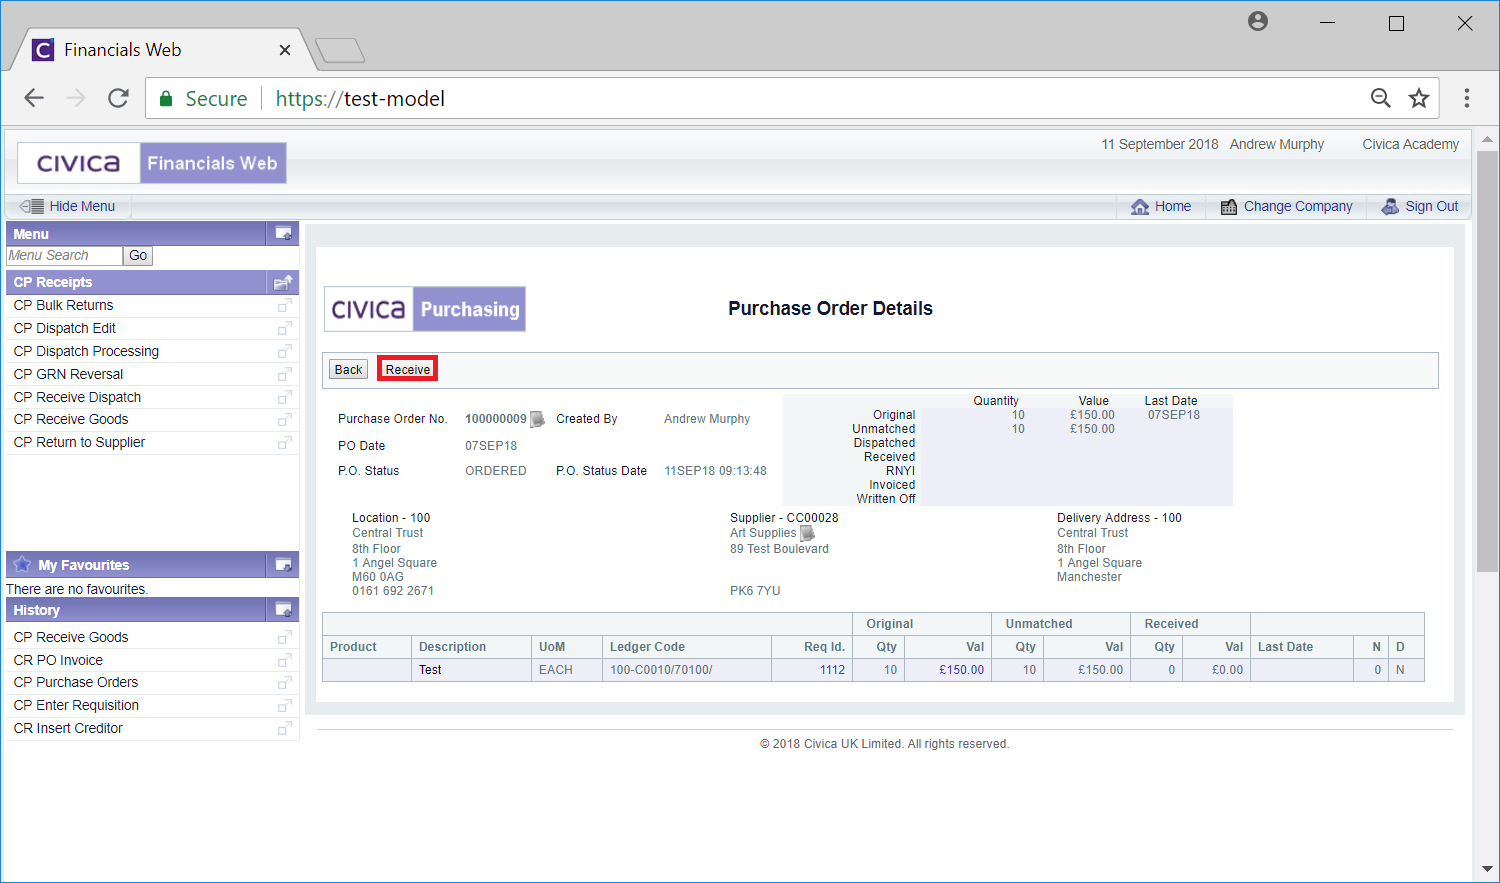
Apart from this button, the functionality on the Purchase Order Details screen is as described in the Purchase Order Details section.
Click on the  button to return to the previous screen, i.e. the Receive Goods screen, so a different Purchase Order can be selected from the Grid.
Clicking on the button will open the Goods Receipt Entry screen:
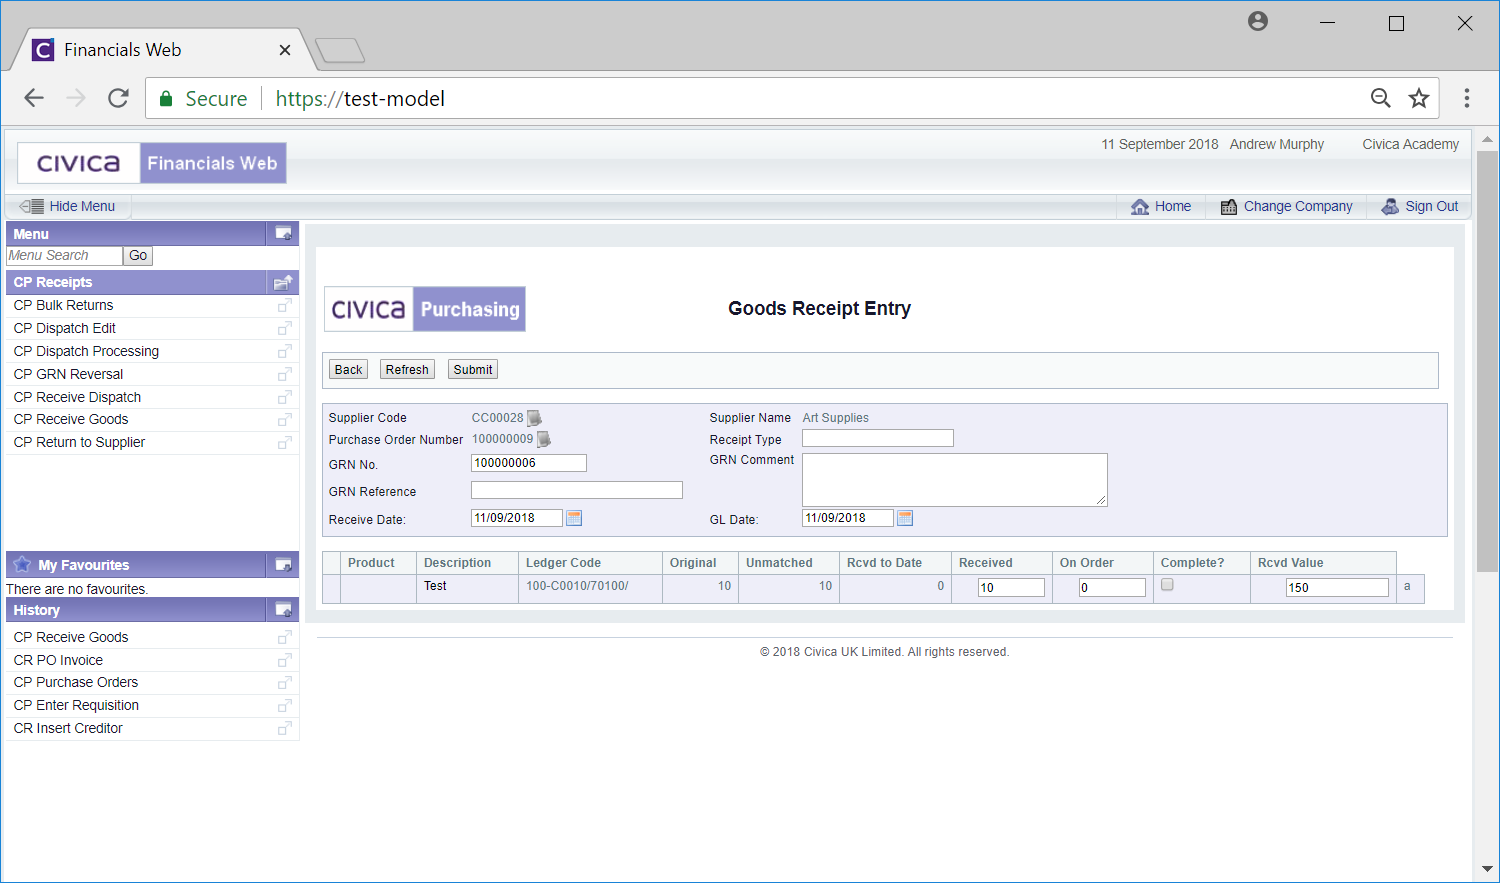
Click on the button to return to the previous screen, i.e. the Purchase Order Details screen, so the details of the Purchase Order can be viewed.
The following fields on the screen may be available:
- GRN No: This field will display the number for the Goods Receipt Note, which will normally be system generated - if not enter the number manually
- GRN Reference: Where the GRN number above is generated by the system, the delivery note number should be added to this field - this may be a mandatory field dependant on your configuration settings.
- Receipt Type: Add the relevant Receipt Type if appropriate.
- GRN Comments: Add any required comments with regard to the Goods Receipt Note in this text box.
- Received Date: This will be populated with today's date but can be amended, if required.
- GL Date: This will be populated with today's date but can be amended, if required.
The Grid at the bottom of the screen may have the following fields and options available:
- Received: This will be populated with the number of goods expected for each Line on the Purchase Order but can be amended as required, e.g. where less goods than were ordered have been received.
- On Order: The system will calculated the number of outstanding goods in this field. For example if the amount in the Received field was 2 but then manually reduced to 1, the amount in this field will display 1. This amount can be changed if required.
- Complete?: This tick box will only be available if you have the correct access rights and should be be selected where the Purchase Order will not be completely fulfilled, e.g. only some of the goods on the Purchase Order will be received. Where this is selected, the appropriate de-commitment will also be made.
The following buttons are available at the top of the screen:
- : Clicking on this button will take you back to the previous screen, i.e. the Purchase Order Details screen. Any changes made to the Goods Receipt Entry form will be lost.
 : Clicking on this button will refresh the screen, cancelling any changes that have been made, i.e. reverting the fields and options on the screen to their original values. This gives you the option to start afresh.
- button will add the GRN to the Purchase Order and you will be returned to the Receive Goods screen so you can select another Purchase Order from the Grid.