To create a Purchasing User follow the steps below:
- Enter CP User in the Menu Search field:
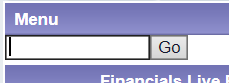
Then click on the  button.
- Select CP User Maintenance from the results list
- A User form will be displayed. Click on the
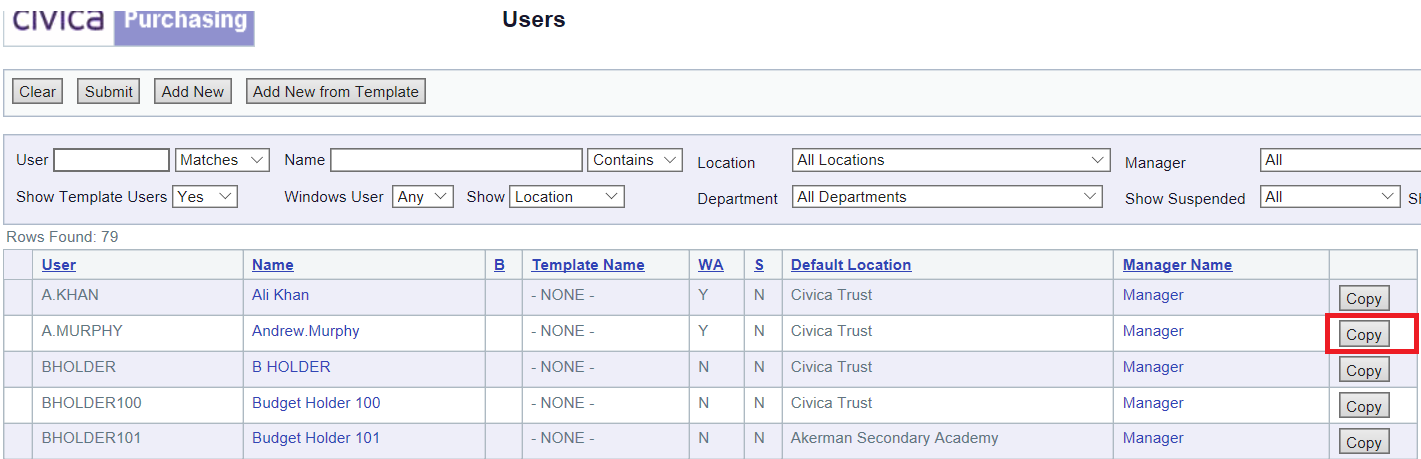
 button and all Purchasing Users will be displayed on the form
- The copy facility should be used to create the User. From the list of Users find a similar User to the one that you wish to create and click on the
 button located to the far left of that row:
A new User Copy screen will open and the User’s details can be added as follows:
- Enter the User ID. This is the User's name with a dot in-between the first name and the surname, e,g, andrew.murphy.
- Enter the User Name, this is the User's full name without the dot, e.g. Andrew Murphy
- Enter their email address in the Email Alias field. This email address will be used to send email notifications from the Purchasing module
- Select their Default Delivery Point, this is the academy or school that they are a member of
- Select Default Printer as Local printer
- Click on Windows Authentication drop down box and a Window User Details form will open:
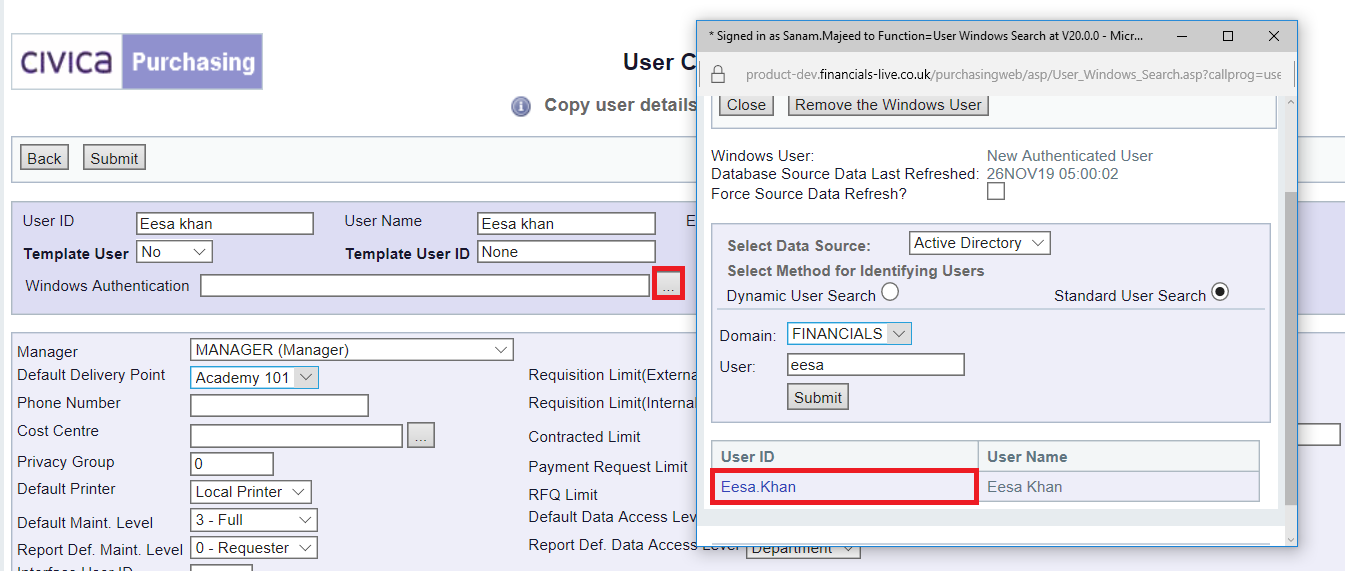
- Select the Standard User Search option
- In the Domain field select your Domain from the drop-down list
- Enter the first name of the User in the User field
- Click on the button
- Select the required User from the list
- Click on the
 button if this form does not close.
- The Windows Authentication field on the User Copy form should now be populated with the Domain\User Name
- Click on the button to save the details and a Set User Password form will open
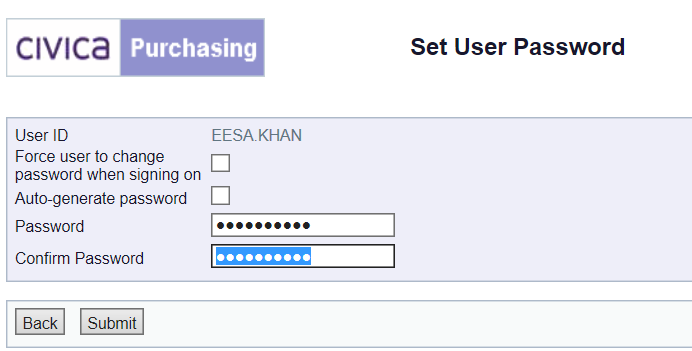
Your user will not need a password to access the Purchasing module. However a password must be created otherwise the copy settings will not correctly copy over to the User.
A simply password such as Password10 should be added.
The User only needs to sign into FinancialsLIVE with a password provided by Civica if you are a hosted site or by your administrator, e,g your IT Department.
- Click on the button and you will be directed to the Edit User form where the User's details can be completed.
Three fields on this form will need to be populated:
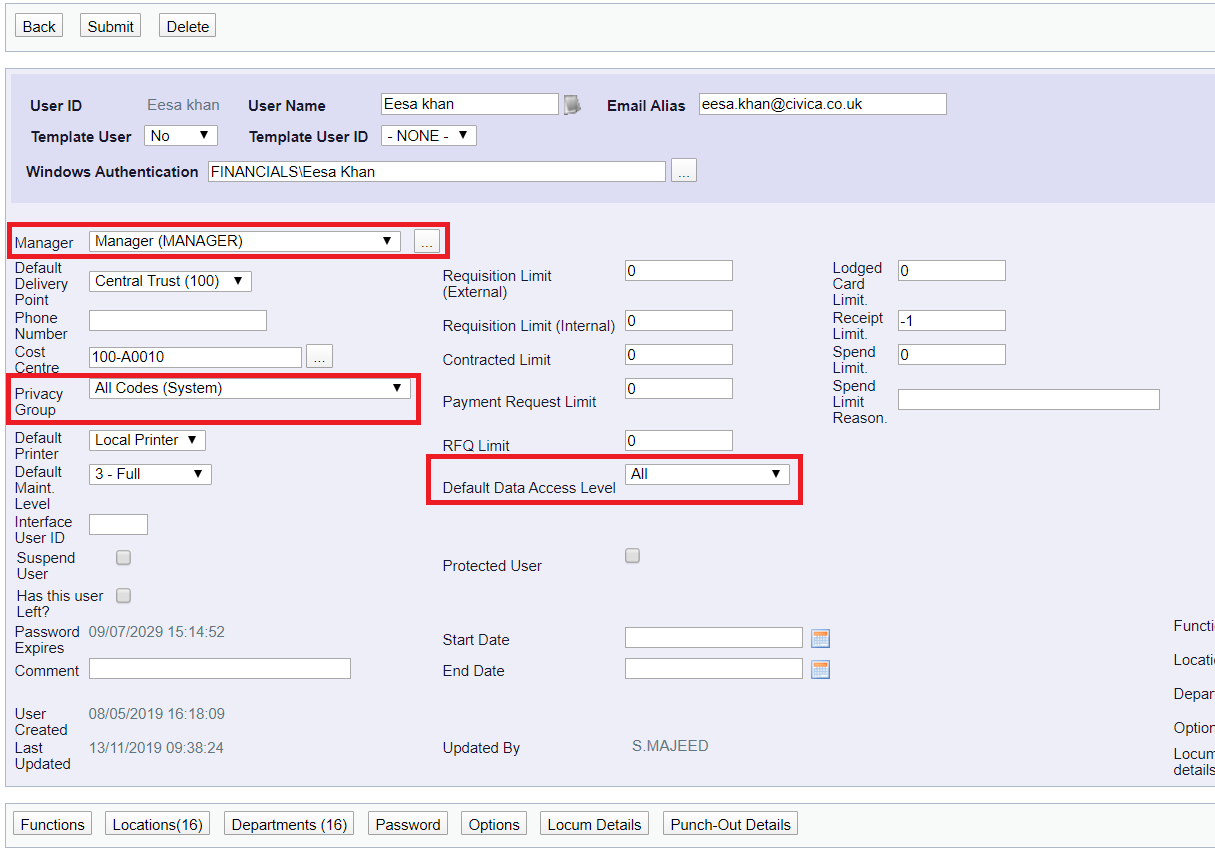
- In the Manager field select the User that will receive the Requisitions where it falls out of the Approval workflow process. This could be their Line Manager if they exist in this drop-down list of Users or a Finance member of staff.
- In the Privacy Group drop-down field select the option relevant for the User. Privacy Groups have been created in order to restrict access to certain Cost Centres within the Purchasing module.
Where the User needs access to either:
- a single cost centre, e.g. 103-A0200
- a particular academy or school, e.g. BM101 for a Business Manager
- a Trust Privacy Groups, for Trust users.
An example of a Privacy Group is displayed below - if this Privacy Group was selected the User would have access to Cost Centre 103-A02000:

- Select the Default Data Access Level field as follows:
- For BHs, Business Managers and Large Spend Approver Users, select the Department option from the drop-down list. This allows these Users to access all Purchase Order lines and related transactions for the Cost Centres that are defined in the Privacy Group field, detailed above.
- For Trust Users select the All option. This will allow these Users to access all Purchase Orders and related transactions across the whole Trust.
- For CANREQ Users, i.e. Requisitioning Users, select the User option from the drop-down list. This will restrict these Users to only have access to the Requisitions that they create.
- Click on the button and the following message will be displayed.
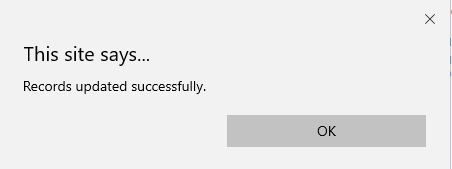
Click on OK.
The Purchasing User has been created.